10 June 1940 Cany-Barville
Events leading up to 10 June 1940
Monday 10 June 1940
Events leading up to 10 June 1940
The Regiment had been involved in holding the west of France with the 51st Highland Division. The 51st had held the rivers from the Somme on each successive day from 4 June 1940 and had received word that the Germans had potentially cut off any further advance.
In summary:Information was received that there was German activity west of the river Durdent. The Lothians were ordered to reconnoitre the Durdent river and found German troops at Cany bridge and in Veulettes and that the bridges between Cany and Veulettes had been destroyed. An attack at Cany by the Lothians pushed the Germans back for the loss of two tanks.
At midday, an R.A.S.C. driver reported to Regimental H.Q. that a column of divisional transport (ordnance convoy) , making its way back along the coast road to Le Havre had been fired upon by German armoured vehicles at Fécamp , west of the River Durdent, and suffered some casualties. This was across the line of withdrawal, behind the Division, between it and Le Havre. Survivors had returned to the division but had no precise information as to the position or strength of the enemy. The regiment was therefore ordered to carry out a reconnaissance to ascertain this.
Three report lines were given: the first was to St. Valery, on the coast, south to St. Vaast; the second, farther west, was the River Durdent; and the third, still farther west, was a line from Valmont to the coast. The Regiment moved off at 1400 hrs: C Squadron on the right, B Squadron on the left, A Squadron in reserve.
It is worth mentioning at this point that there were very few maps available for use by the Regiment. In the case of B squadron, a private Dunlop Tourist map was available but it was unfortunately too small a scale. The map for the whole of the Squadron, which consisted at the time of 6 Light Tanks (the two lost at Remeling having never been replaced) and 14 carriers, was a single Michelin guide, held by the Squadron commanding officer. The country was a network of roads and lanes and, in view of the possible activities of 'Fifth Columnists', signposts could not be relied on.
The regiment in due course found the enemy to be holding the line of the River Durdent from Cany Barville to the sea, having either blown up or held each of the four bridges and both B and C squadrons suffered casualties. It was tragically clear that the German forces had broken through the French, had cut across west and north from Rouen, and that the Division was completely trapped, hemmed in on a square, with one short side open to the sea.
Cany-Barville: initial recce
The only carrier left from B squadron carrier troop 6 was attached to the two carriers of Lt Robert Baird's
troop (either 4 or 5 carrier troop) to make up a full troop of three carriers. The three carriers (with
two maps between them) approached Cany from the D50, Route de Touffrainville. The leading carrier was commanded
by L/Sgt Charlie Foley, a carrier commander from Lt Baird's troop; the second carrier was commanded by
Lt Baird; and the third was commanded by the troop leader of 6 carrier troop, TSM Jimmy Hogarth. Foley was
on the left, Baird on the right and Hogarth on the left as they travelled down the road. At the junction with
the D925 from St Valery en Caux, the carriers negotiated a road block and also a dead horse. As they swept
around the bend leading into Cany, and straightened up, they were fired upon from the first houses on the right.
The Bren guns returned fire as the carriers executed a smart about-turn and returned to the road junction.
There they were met by Second Lieutenant Otter-Barry's No 5 troop (3 carriers); and Major WJ McCulloch (B squadron commander) and Captain Pat Turcan with squadron HQ and their 2 tanks with Captain Turcan commanding one tank and Squadron Sergeant Major Alfie Upton the other.
Since the information held was that the Germans were a light armoured motor bike column, the Major and Captain Turcan decided to send 2 tanks down to reconnoitre enemy positions at Cany. There was some discussion about who would crew the tanks. The Major would not be included because he was the B squadron commanding officer. Captain Pat Turcan therefore commanded his own tank Blue Bonnet with his driver Trooper Billy Bainbridge and TSM Hogarth as gunner instead of Turcan's gunner, Alex Hogg. SSM Alfie Upton was supposed to go in the Major's tank Bannockburn as commander; however he was replaced by Charlie Foley with Cpl John C Stevenson as driver and Trooper Wright as gunner.
Charlie Foley's tank led on the right going in, with Captain Turcan's tank second, on the right. The tanks navigated the first road block and the dead horse. There was no movement from the first houses on the right going into the town. The tanks continued past a second roadblock just past the bridge and through out of town, where they turned around to come back the same way. The turning point was a small road to the left, just past an overturned German car. The turnabout meant that Turcan's tank became the lead tank.
The tanks dog-legged around the abandoned German car and started back into Cany. Suddenly they were hit from the left with a burst of fire from a small mm shell, possibly 3.7mm equipment. Despite return fire, the second tank was hit as well.
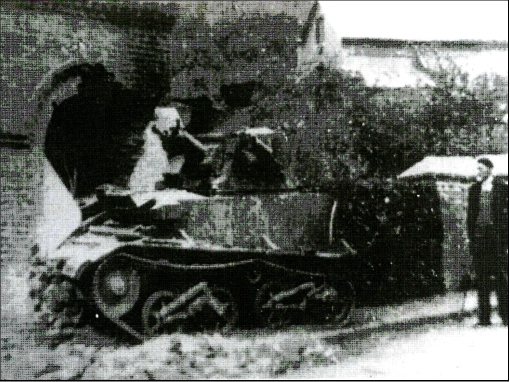 Capt. Pat Turcan's Blue Bonnet crashed
into the dentist's house in Cany-Barville
Capt. Pat Turcan's Blue Bonnet crashed
into the dentist's house in Cany-BarvilleThe driver of the Turcan's tank, Bainbridge, was killed immediately and as a result the driverless tank picked up speed and hit the house on the corner of the turn into town. Turcan managed to evacuate the tank using his own cupola. The gunner's cupola was stuck and he had to push aside the gun butts and evacuate the tank from the commander's cupola. Despite a broken left leg and shrapnel wounds in both legs, the gunner managed to escape, but was later captured at Veules-les-Roses on 12 June 1940. He became a prisoner of war and was repatriated in 1943.
The commander of the second tank, Foley, was killed outright. Turcan helped to pull the driver, Stevenson, out of the tank before he was hit in the shoulder by small arms fire and later captured. The gunner escaped but was possibly later captured.
Stevenson was helped into the village by a local boy and girl, and left to hide in a cupboard in an empty pastry shop. He was there for two days, by which time the Germans had overrun the village of Cany-Barville. A nearby doctor and his wife, Mme Aureille, heard sounds as they passed the party shop and, on investigation, they discovered Stevenson. The doctor broke into a local pharmacy to obtain the required medication and he patched up the soldier as best he could. He could see that gangrene had already set into Stevenson’s right leg and there was little he could do about that. Stevenson was captured and taken to the Chateau at Cany-Barville, where he was placed in one of the German tents in the front garden. It was here that his leg was amputated at the hip. He became a prisoner of war and was repatriated in 1943.
Major McCulloch sent Jim Johnston into Cany after the remaining B squadron troops heard the noise of the tanks being fired upon. He withdrew after being shot at by an anti-tank gun and without seeing the other two tanks and reported AT guns, machine gunners and at least six big tanks.
The graves of Billy Bainbridge and Charlie Foley are situated at Cany cemetery. Charlie Foley's grave reads as follows (note that the grave and the roll of honour incorrectly state Charlie's death as 11 June instead of 10 June):
C. FOLEY
1ST LOTHIANS & BORDER YEO.
ROYAL ARMOURED CORPS
11TH JUNE 1940 AGE 32
GOD GIVETH
GOD TAKETH AWAY
WE WILL MEET AGAIN
IN GOD'S ABODE
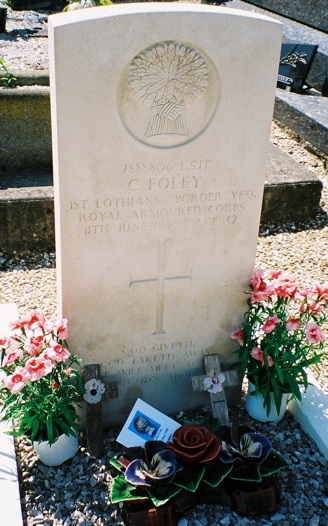
Photograph of Charlie Foley's grave in Cany-Barville (photo taken June 2009)
Billy Bainbridge's communal grave with two other L&BY men reads as follows:
6012447 TROOPER
G. W. 'BILLY' BAINBRIDGE
1ST LOTHIANS & BORDER YEO.
ROYAL ARMOURED CORPS
1OTH JUNE 1940 AGE 17
HE DIED
THAT WE MIGHT LIVE
420222 TROOPER
W. A. BUCHANAN
1ST LOTHIANS & BORDER YEO.
ROYAL ARMOURED CORPS
10TH JUNE 1940 AGE 19
7891265 TROOPER
K. JOHNSON
1ST LOTHIANS & BORDER YEO.
ROYAL ARMOURED CORPS
10TH JUNE 1940 AGE 23
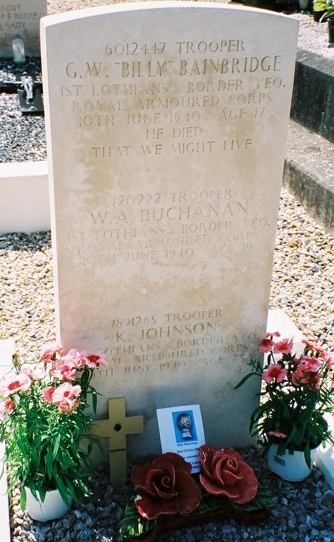
Photograph of Billy Bainbridge's communal grave in Cany-Barville (photo taken June 2009)