Photos
email us
List of Photographs
1. Before the war and T.A. Camps
2. 'B' Squadron photos
3. 'A' Squadron photos
4. 'C' Squadron photos
5. HQ Squadron photos
6. RHQ photos
7. During the war
8. During the war - IWM collection
9. POWs during the war
10. Repatriation 1943
11. After the war
1. Before the war and T.A. Camps
Before the War
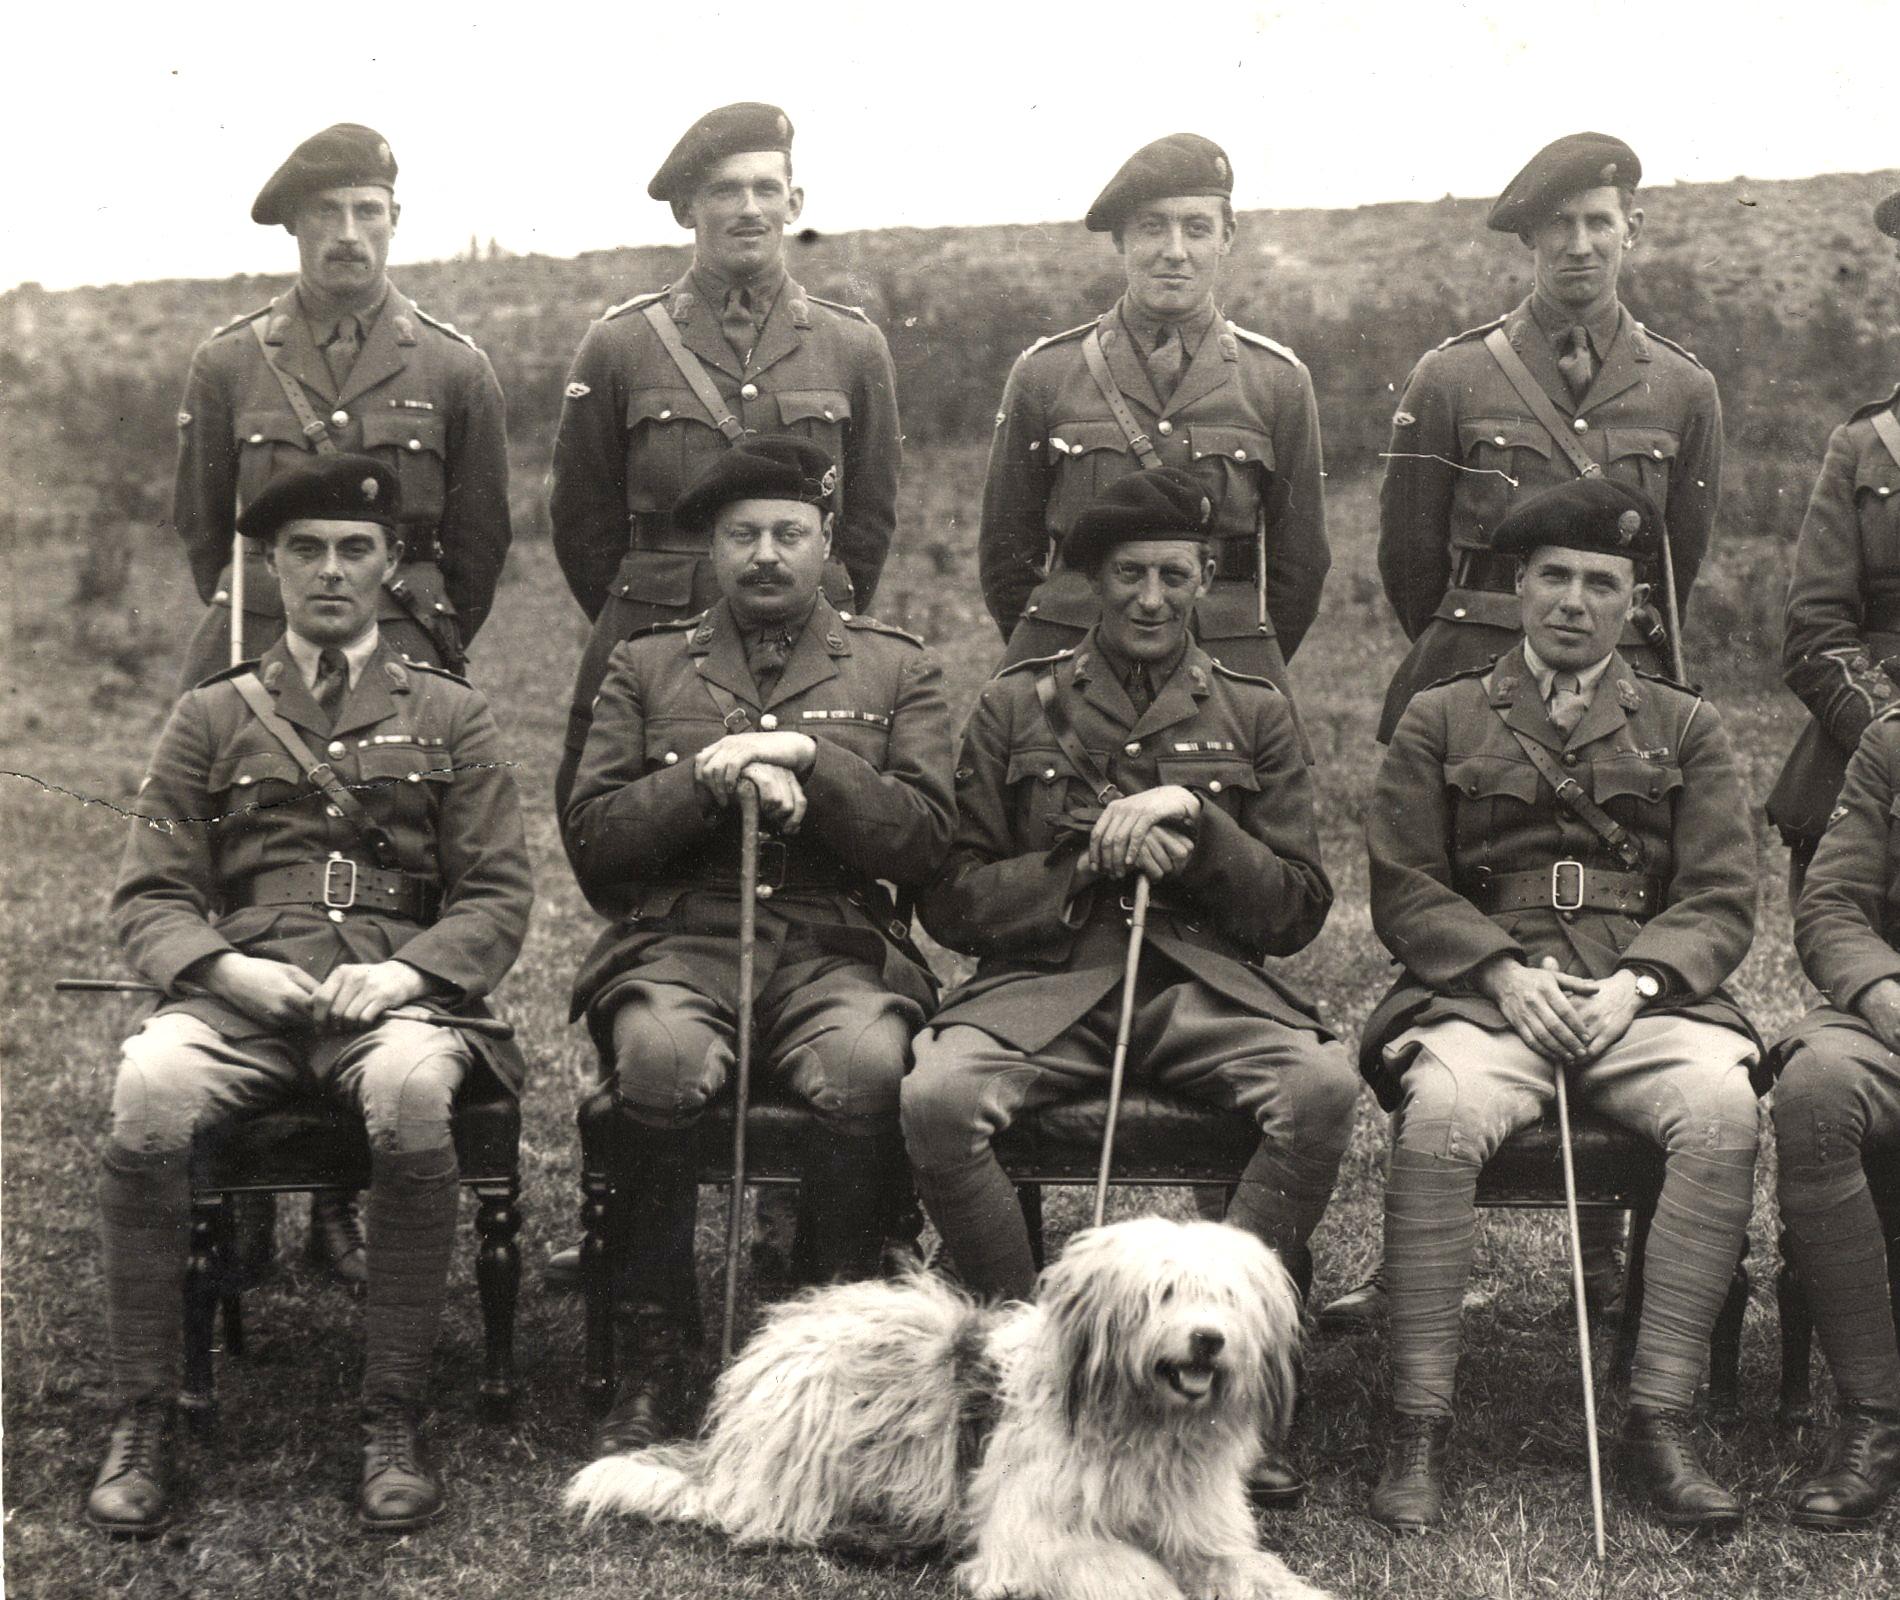
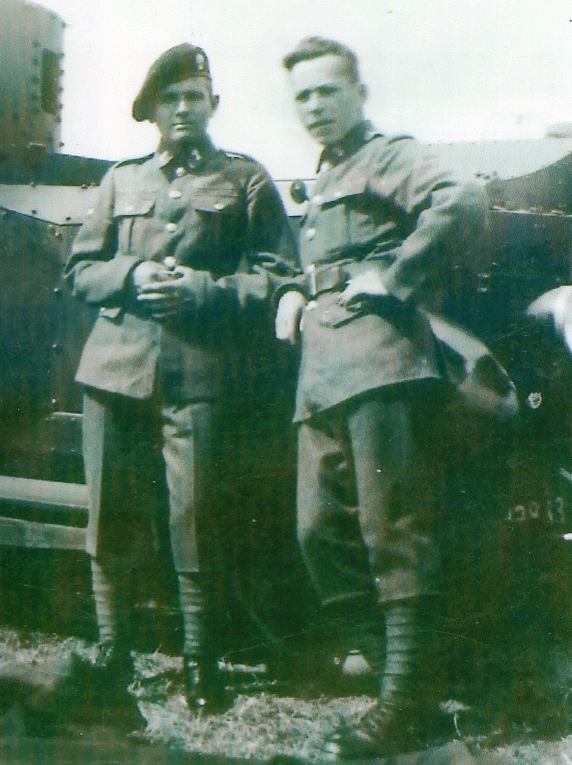
| Officers before the war (photo courtesy of the Earl of Haddington |
PHOTOGRAPH 1A1: Pre-War photo of
L&B Officers
|
| Pre-War photo of inspection by the Earl of Haddington (photo courtesy of the Earl of Haddington) |
PHOTOGRAPH 1A2: Pre-war inspection by
Earl of Haddington
|
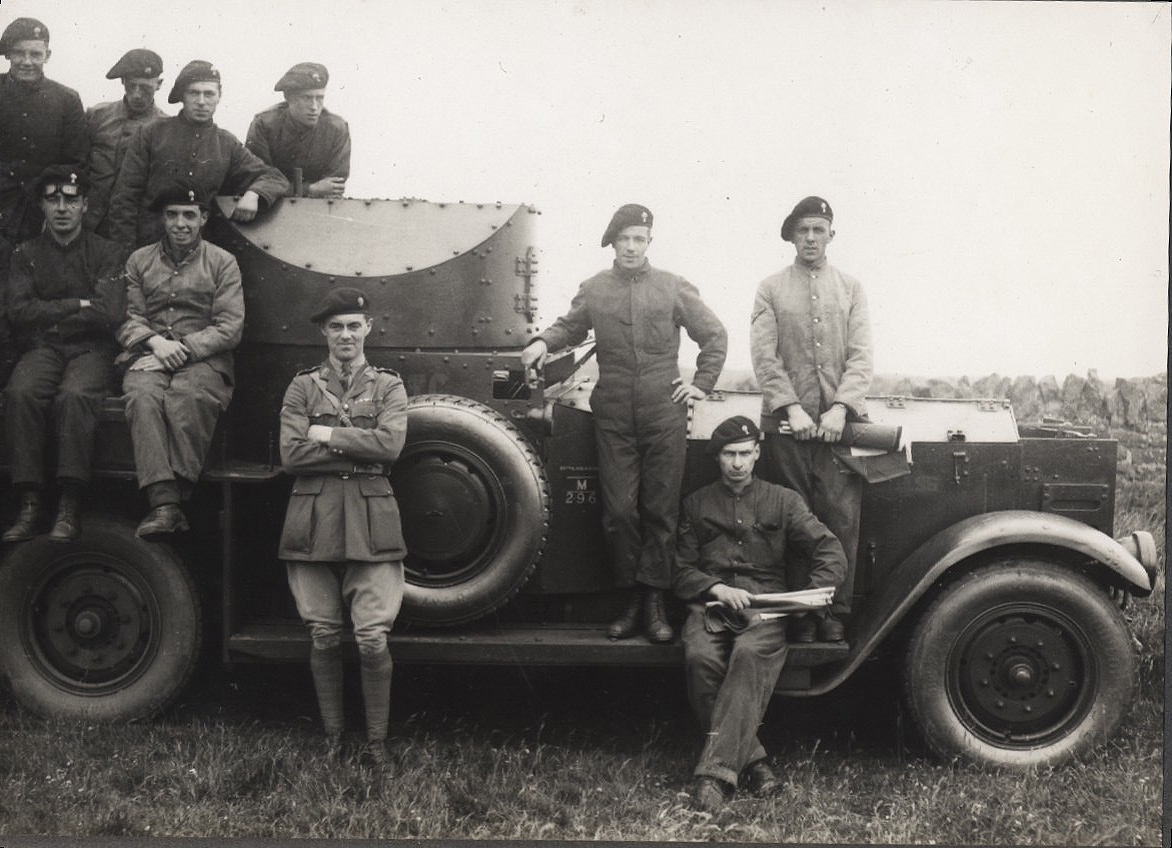
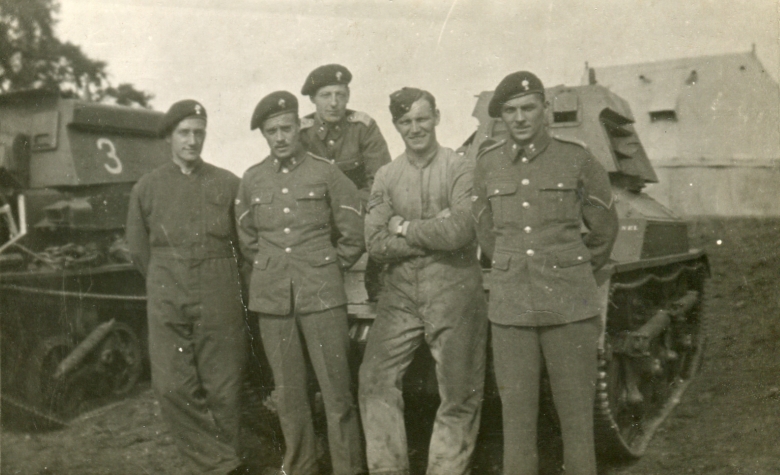
| Pre-War photo of armoured car(photo courtesy of the Earl of Haddington) |
PHOTOGRAPH 1A3:
Pre-war armoured car with the Earl of Haddington
|
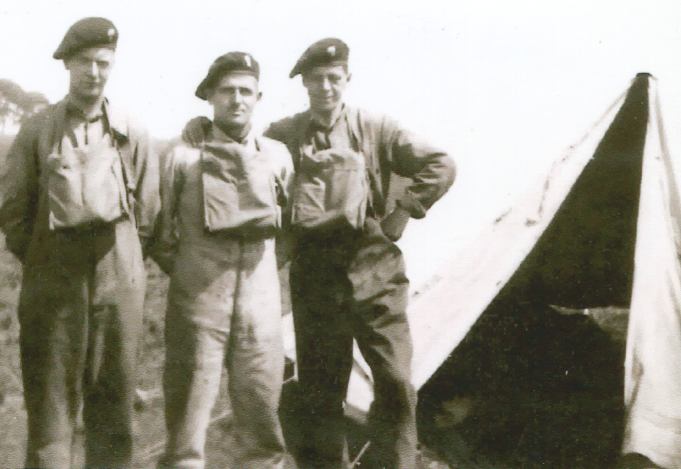
Before the War - early 1930s
| During the 1930's: Jack Allan middle row far right |
PHOTOGRAPH 1B1: Lothians during the 1930s
|
| Early 1930's (Jack Allan left): |
PHOTOGRAPH 1B2:
Early 1930's
|
Before the War - 1933 Scarborough
| Scarborough: Jackie Allan is in the middle. See the gas masks slung in front of them. |
PHOTOGRAPH 1C1:
Scarborough
|
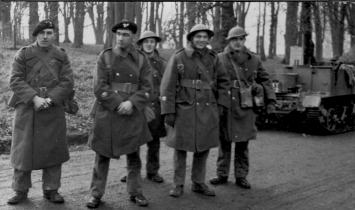
Before the War - 1935 Catterick
| 1935 in Catterick (Jack Allan back row left): |
PHOTOGRAPH 1D1:
1935 Catterick
|
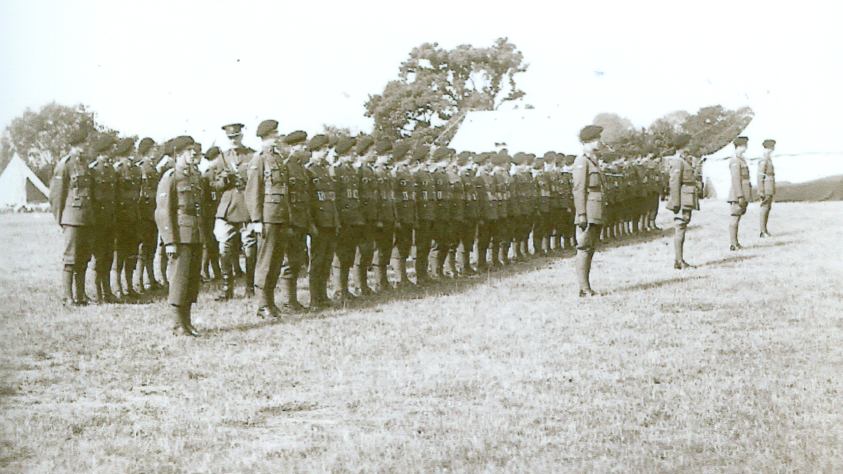
| 1935 in Catterick - general's inspection: |
PHOTOGRAPH 1D2:
1935 Catterick General's Inspection
|
| 1935 in Catterick - guard: Jackie Allan second from right. |
PHOTOGRAPH 1D3:
1935 Catterick guard
|
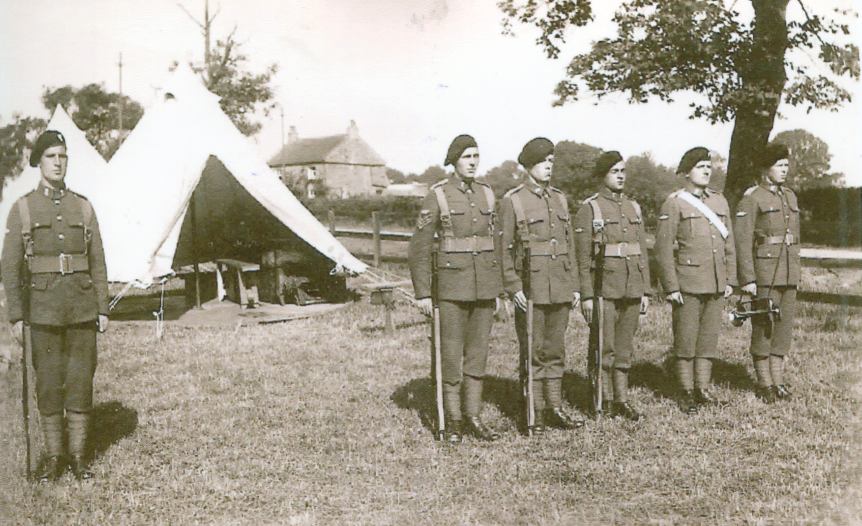
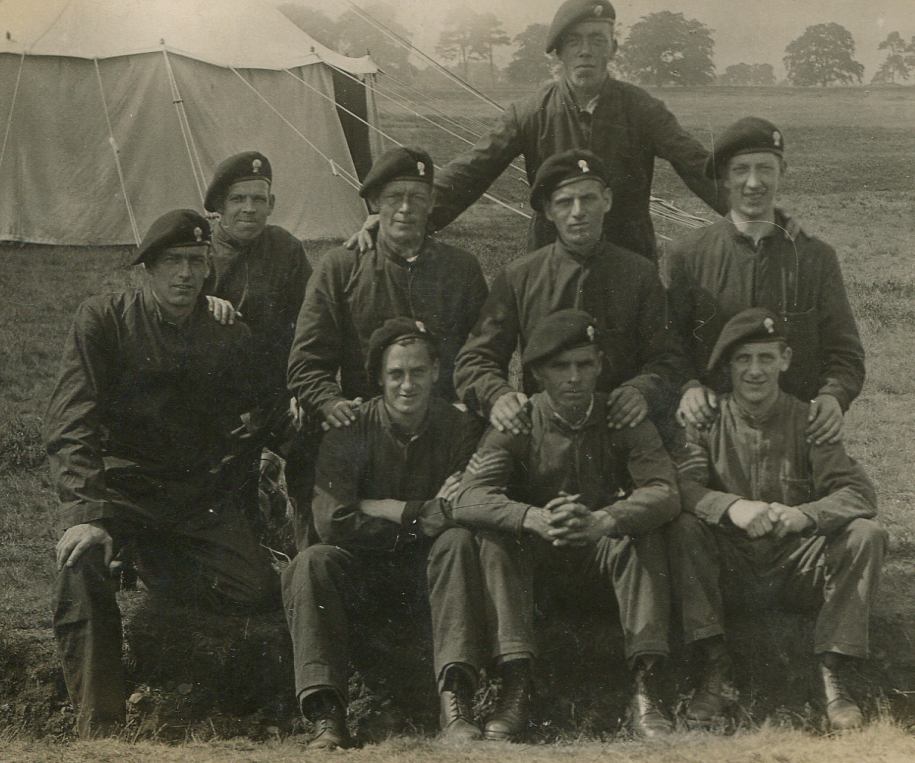
Before the War - 1936 TA camp
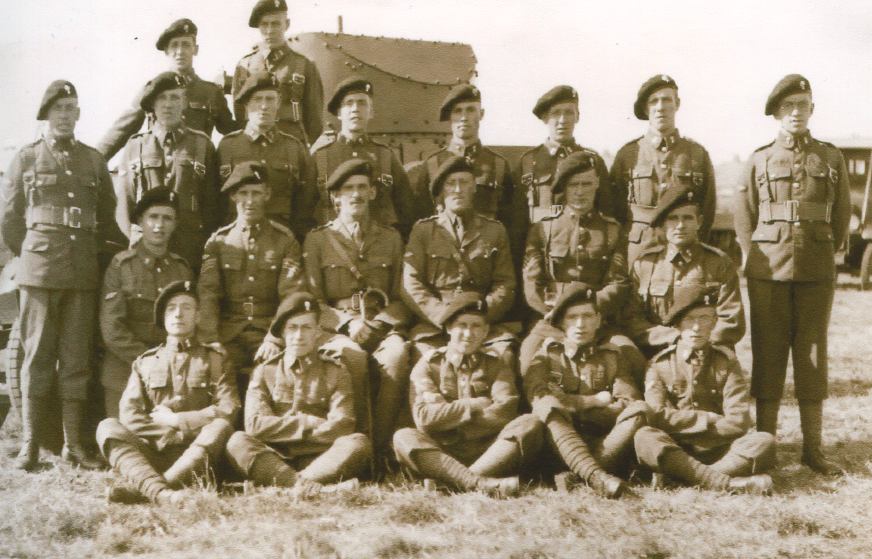
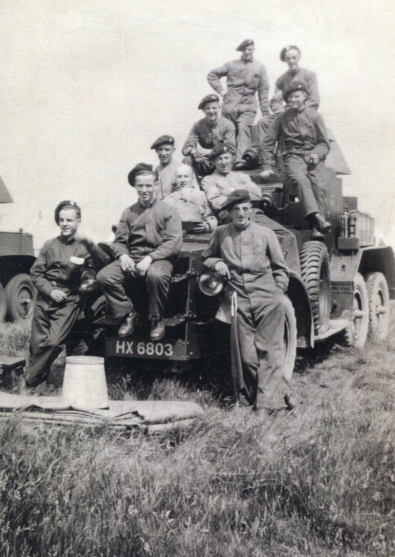
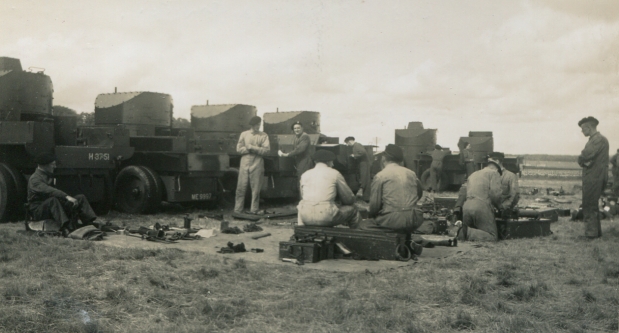
| Gailes 1936 T.A. Camp: 19th (Lothians and Border Horse) Armoured Car Company Royal Tank Corps.
Company of 16 cars drawn up - Rolls Royce 40-50 with Sgt Bob Cameron and Cpl Bill Donaldson: |
PHOTOGRAPH 1H1:
1936 Gailes T.A. camp
|
Before the War - 1937 TA camp at Barrie
| Barrie 1937 T.A. Camp with Jake Clark, Sandy Ross, Jimmy Hogarth, Tommy Dahill, Sgt Bob Cameron |
PHOTOGRAPH 1J1:
1937 Barrie Camp
|
| Barrie 1937 T.A. Camp: Sometimes the TA training came in use - this shelter created by hanging a
tarpaulin between two vehicles was used in Boiry |
PHOTOGRAPH 1J2:
1937 Barrie Camp
|
| Barrie Buddon: TOP: Sgt Lamb; Sgt Tom Easton. 3RD: Charlie McKinney; Rab Stewart. 2ND: Tom Rennie; Curly
Fairholm (yes - army humour - he has little hair); Bert Christie. FRONT: Paddy Cox(?); Bill Tunnah;
Bill Ronald | PHOTOGRAPH 1J3:
Barrie Budden
|
Before the War - 1938 TA camp at St Andrews
| St Andrews 1938 Camp showing the fitting of the gas masks: JM Hogarth; Tommy Dahill; Jake Calrk; Geordie
Corr; Sgt Bob Cameron; Cpl Bill Donaldson |
PHOTOGRAPH 1K1:
1938 St Andrews Camp and gas masks
|
| St Andrews 1938 Camp: Bill Miller; Bill Donaldson (RSM 2nd line); Charlie Foley; Behind- Meechan (2nd line
engine driver); Charlie McKinney half behind chap with fists on hips - Sgt Easton; Charlie Borthwick; Eddie
Christie |
PHOTOGRAPH 1K2:
1938 St Andrews Camp
|
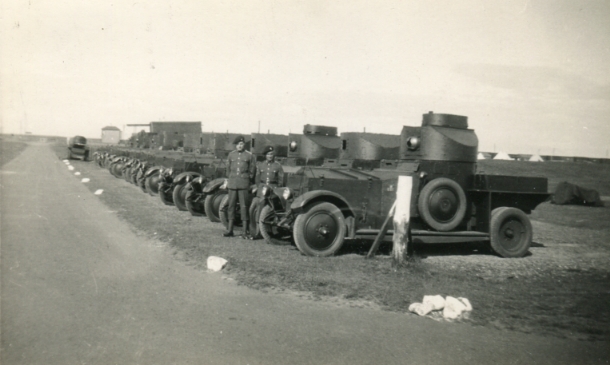
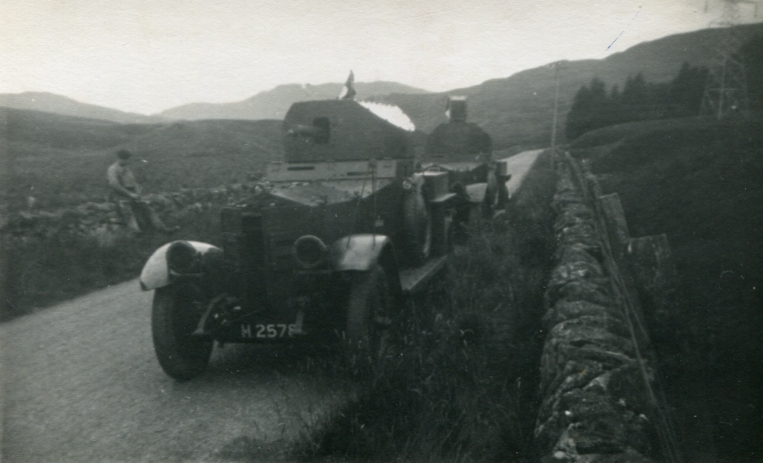
| Sub section of 2 cars Rolls Royce 40-50 near Sma' Glen 1938: with a Vickers .303 on a swivel mounting,
2 slits for the driver and co-driver (other crew: gunner; and car commander). Note the radiator flaps open at a point to prevent
overheating. They could be closed by the co-driver pulling a lever inside the car, and the front of the car would
then be flat. |
PHOTOGRAPH 1K3:
1938 Sub section of 2 cars
|
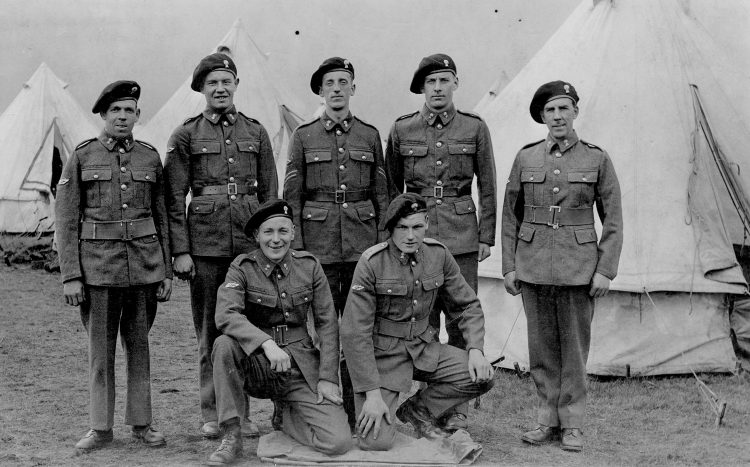
Before the War - 1939 TA camp at Annsmuir, Fife
| Ladybank 1939 Annual camp: Sgt Arbuthnott (1st); Mr Miller (3rd); Mr Henderson (5th); Mr Toombs (7th);
Mr Tweedie ((9th); RQMS Kerr (11th) | PHOTOGRAPH 1L1: 1939 Ladybank Annual Camp
|
| Camp A Guard showing service dress: Cpl Ernie Leeper; Wattie Robertson; Kenny McCarton; ?; Johnny Finlayson;
Hunter; Charlie Borthwick | PHOTOGRAPH 1L2: Camp A
Guard |
| Annsmuir Camp 1939 | PHOTOGRAPH
1L3: Annsmuir Camp 1939
|
| Annsmuir squad under inspection | PHOTOGRAPH 1L4: Annsmuir: Bill Lawrie and squad under inspection
|
| At Annsmuir: Norman Pattullo, Geoffrey Dove-Wilson, Jo Hume |
PHOTOGRAPH 1L5: Norman Pattullo, Geoffrey Dove-Wilson,
Jo Hume
|
| At Annsmuir: Nigel Baird, Ronnie Roberston, Gordon Simpson, John Brackley, Bert Graham, Jimmy Dallmeyer |
PHOTOGRAPH 1L6:
Baird, Robertson, Simpson, Brackley, Graham, Dallmeyer,
Jo Hume |
| 1939 Annsmuir: Standing: ?; Kneeling: Tpr Alf Black; ?; ?; Tpr Kenny Johnson; Tpr Ingles; FRONT: Tpr Brydon; Sgt Arbuthnot; Cpl Aspey |
PHOTOGRAPH 1L7:
Johnson, Ingles, Brydon, Arbuthnot, Aspey
|
| 1939 Annsmuir: 3 D/Rs. In the background are two of 'Alexander's £10 cars' that were used at Annsmuir to
replace armoured vehicles. On the left is the old 1920's Humber. The second car in could be the Lanchester, which
had a seni-automatic drive. |
PHOTOGRAPH 1L8:
Alf Black on the left
|
| 1939 Annsmuir: Alf Black is on the right. |
PHOTOGRAPH 1L9:
Alf Black on the right
|
| 1939 Annsmuir: The three at the back in the middle have polished leather belts, which were worn for
walking out in the 19th ACC. The other four are wearing the old style broad webbing blancoed belts. All
are wearing old pre-War Service dress. |
PHOTOGRAPH 1L10:
Alf Black second right standing
|
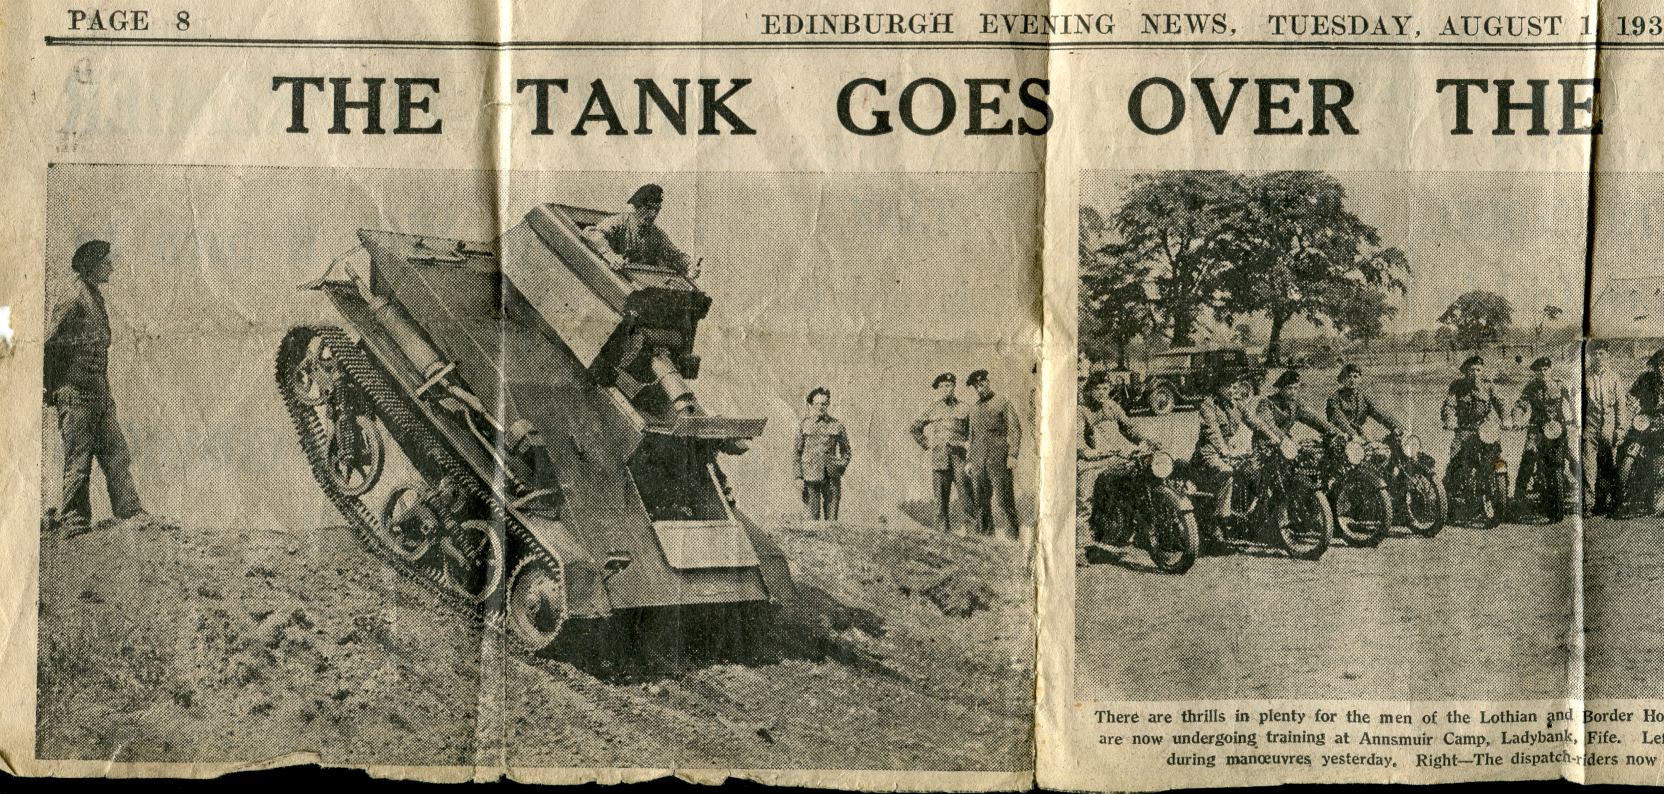
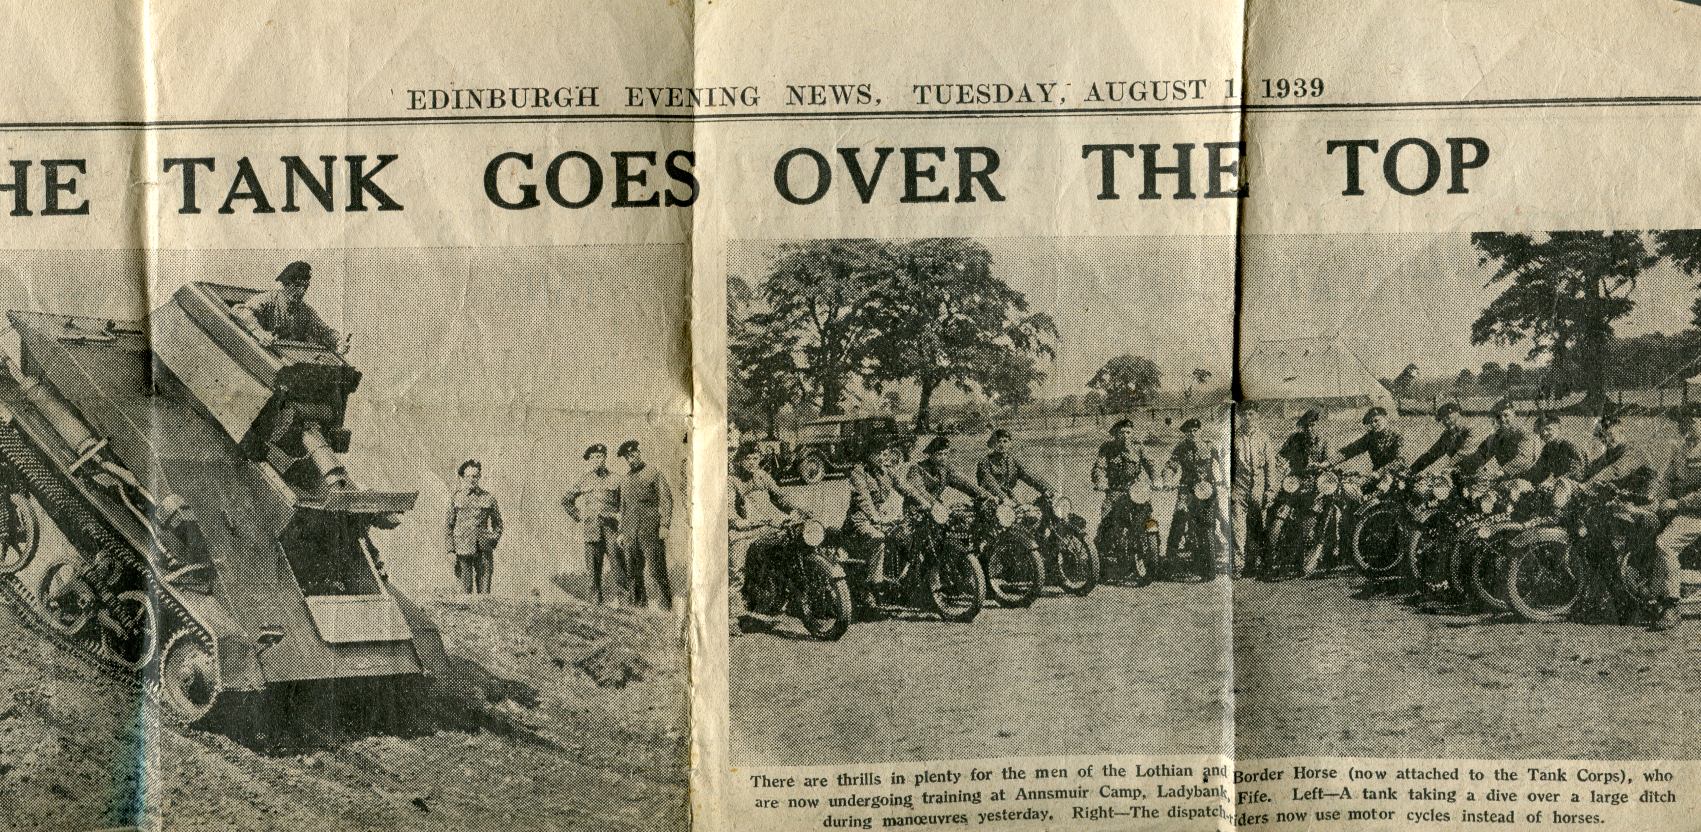
| 1939 Annsmuir: Newspaper article dated 1 August 1939 about the Lothians at Annsmuir. |
NEWSPAPER ARTICLE 1L11:
LEFT HALF and NEWSPAPER ARTICLE 1L12:
RIGHT HALF
|
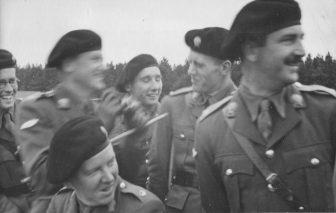
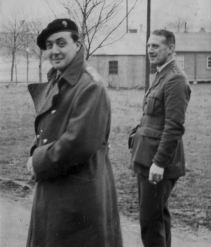
Before the War - undated photos
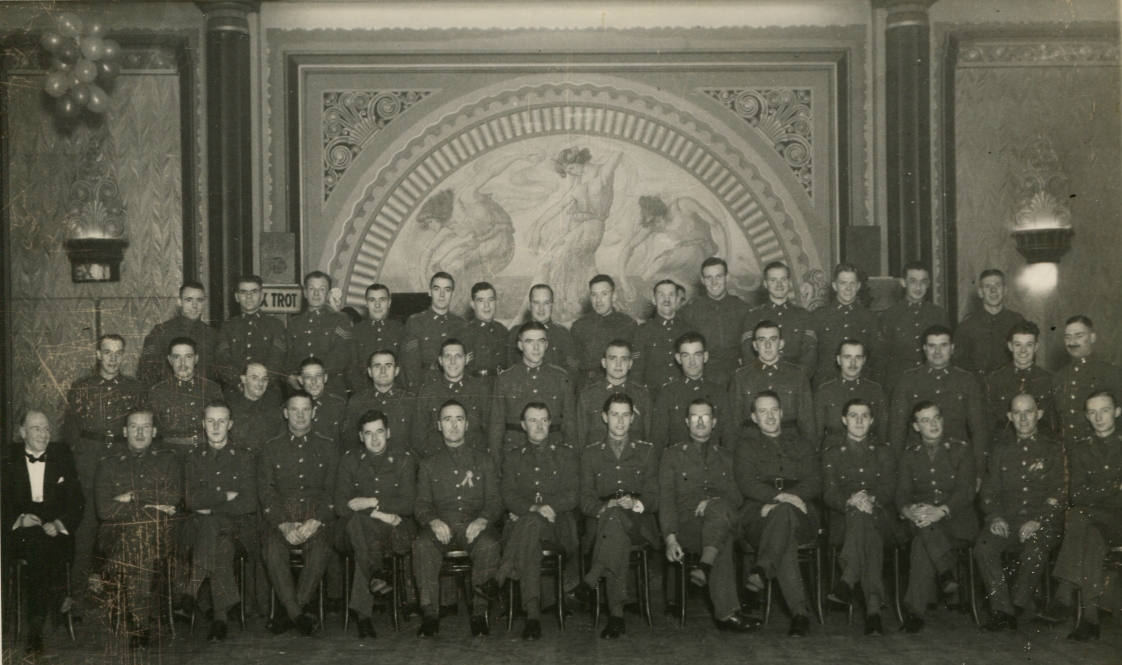
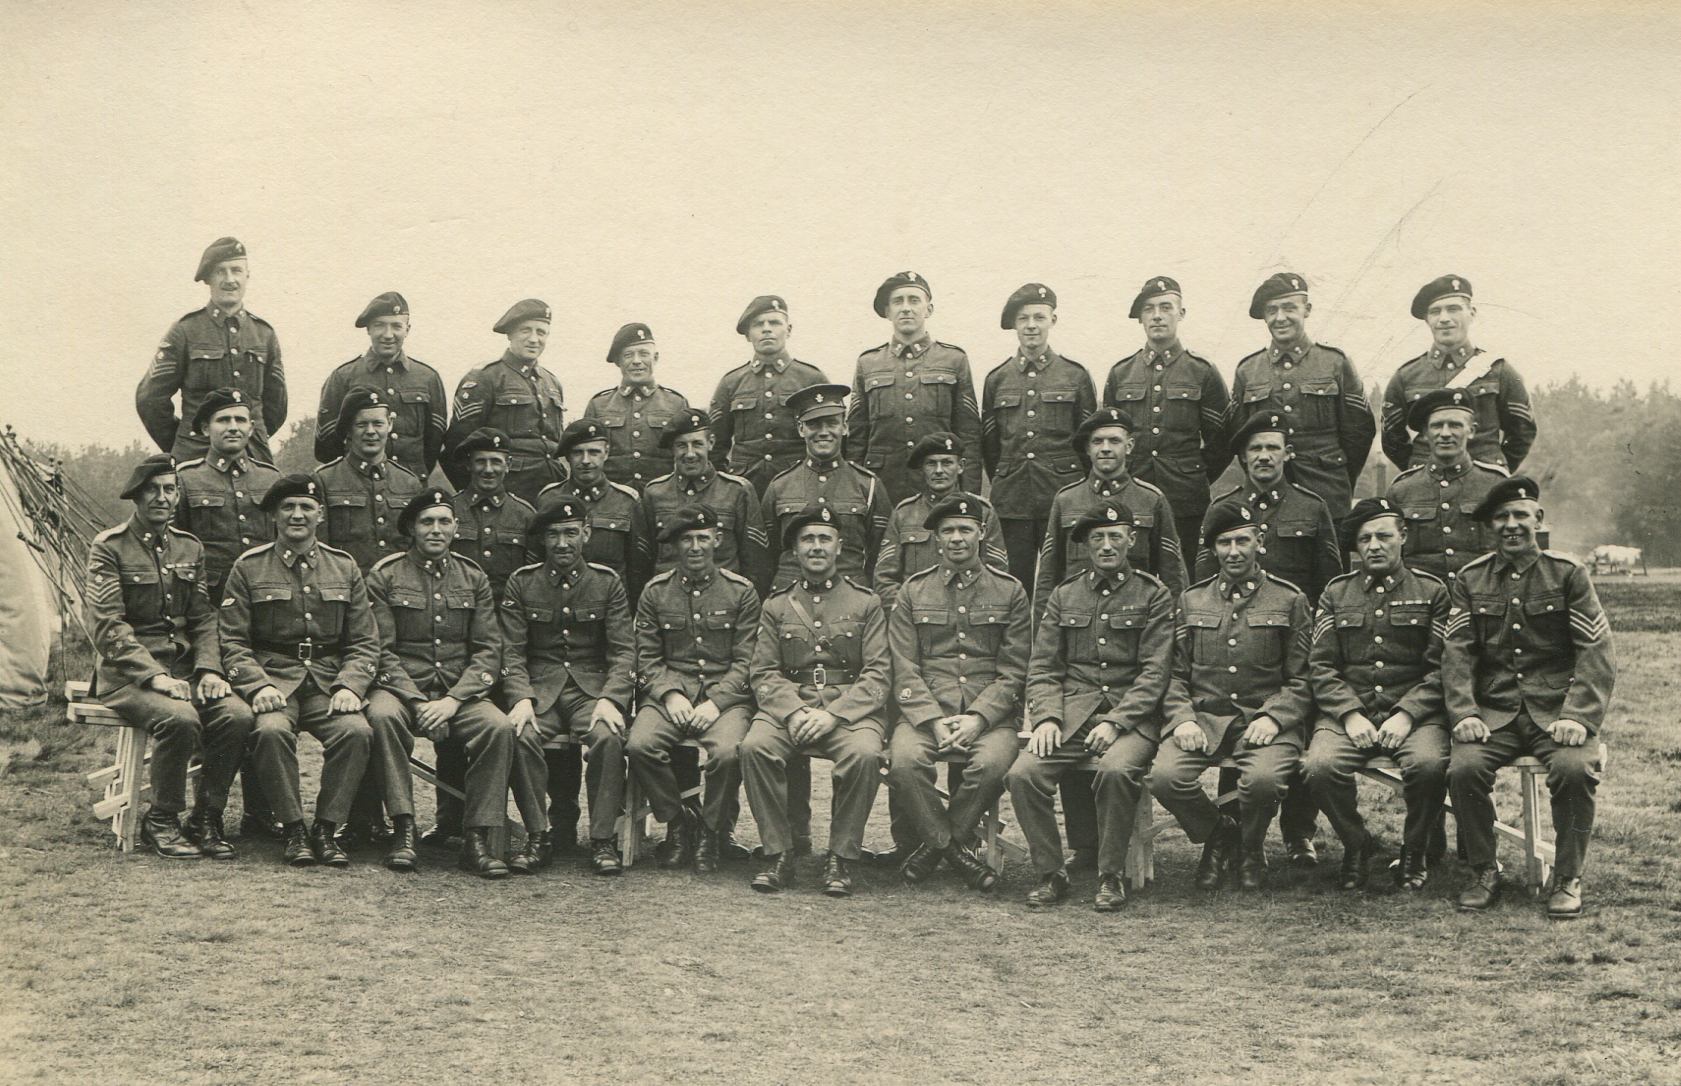
| Regimental Dance 1939. BACK: ?; Sgt Davy Arbuthnot; Ted Lawrence; Geordie Kerr; Sgt Ian Jack; Sgt Bobby Mitchell ; ?; ?
Bill Penicuik; Shufty Low; Sgt Ian Grant; Rab Smith; Sgt Veitch (worked in city chambers); Sgt Piper Wilson. MIDDLE: Tom Easton;
Tucker Main; Sgt Lamb; Sgt Bobby Monteith; Sgt Jackie Allen; SSM Jimmy King; SSM John Henderson; SM Jimmy Strickland; Sgt Bob Cameron;
Sgt Jimmy Hogarth; Hughie Cairncross; ?; Sgt Rab Stewart; Sgt Jimmy Merrilees. FRONT: Bandmaster Tooms; Major Dallmeyer;
2/Lt ?; RQMS Dick Kerr; 2/Lt Jardine; RSM Barnes; 2/Lt JR Johnston; Lt Nigel Baird; Cpt Ronnie Watson; Padre
Rankin; 2/Lt Kenneth Spreckley; 2/Lt poss Ford; SM Jock Campbell; Lt Ross. |
PHOTOGRAPH 1Z1:
1939 Regimental Dance
|
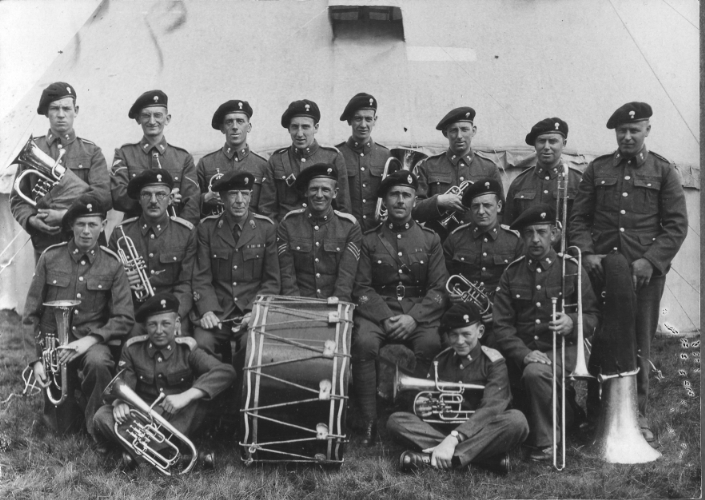
| Bandmaster Toombs and band |
PHOTOGRAPH 1Z2: Bandmaster Toombs and band
|
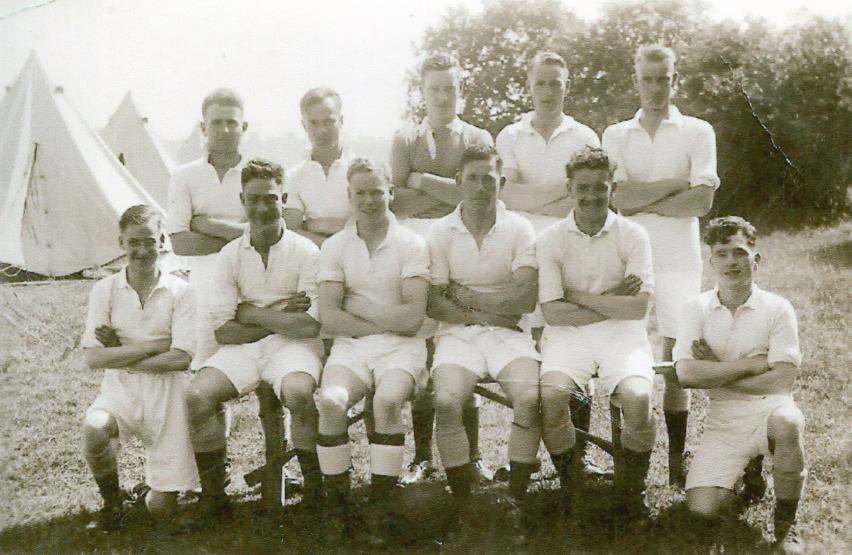
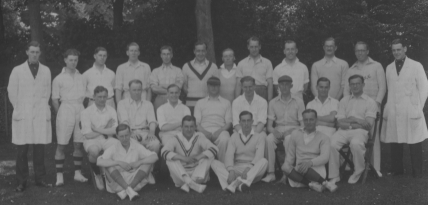
| Cricket match Officers v other ranks |
PHOTOGRAPH 1Z3: Cricket officers v ORs
|
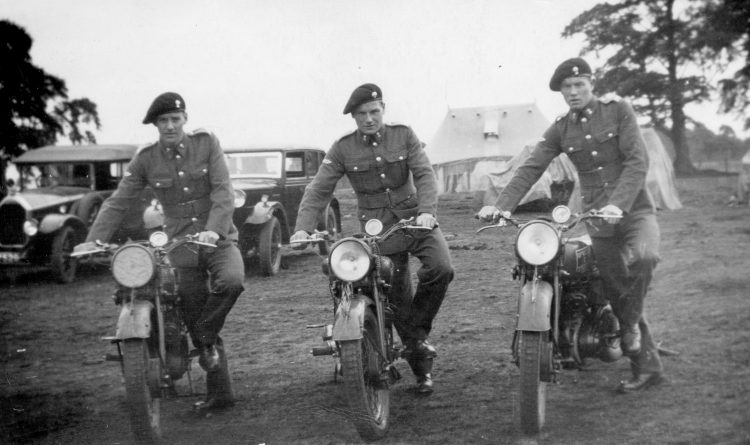
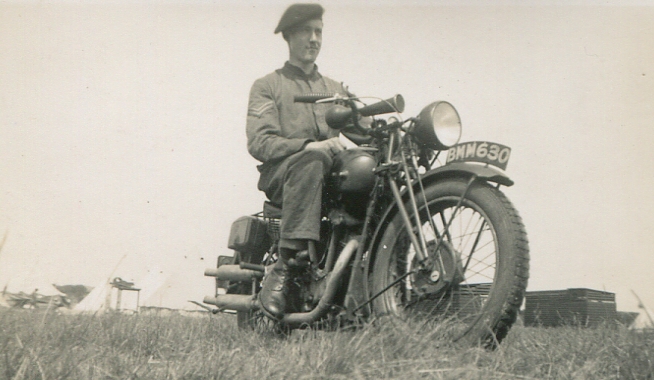
| Tommy Dahill on the m/c (probably 1938) | PHOTOGRAPH 1Z4:
Tommy Dahill
|
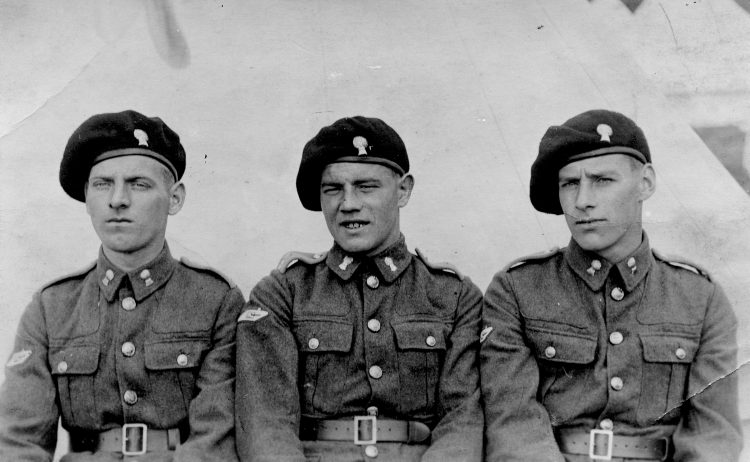
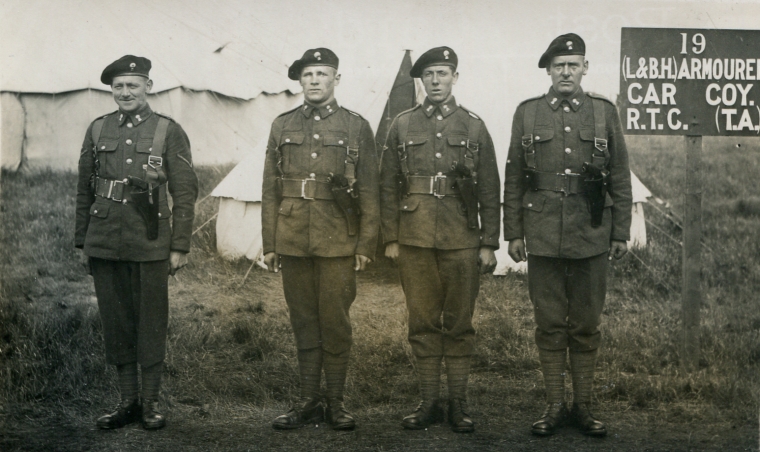
| Guard showing uniform: puttees under box pleat in trousers, pistol holster and webbing across each shoulder
and down each side; regimental buttons and the wheatsheaf on the collar and black beret (probably 1938) | PHOTOGRAPH 1Z5:
Guard uniforms
|
| Kit inspection (vehicles) (probably 1938) | PHOTOGRAPH 1Z6:
Vehicle kit inspection
|
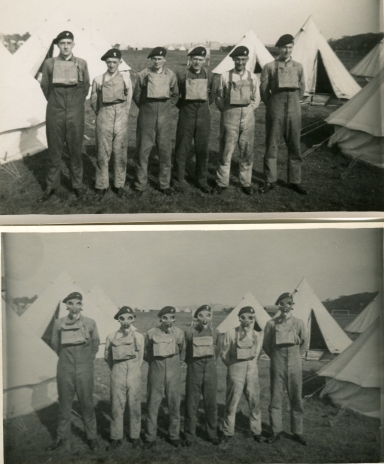
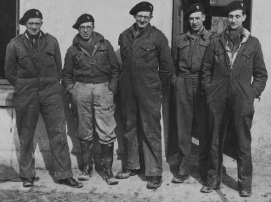
| LBY sergeants undated: BACK - SQMS Hughie Ross 'C'; Sgt Curly Fairholm; SQMS Bill Sinclair 'B'; Sgt Bobby
Menteith; Sgt Dave Artbuthnot; Sgt JM Hogarth 'B'; Sgt RAM Stewart 'C'; Sgt Ian Jack 'HQ'; Sgt Hugh Cairncross;
Sgt Bobby Mitchell D/Rs; MIDDLE - Sgt Jackie Allan 'A'; Sgt Pat Leckie 'A'; Sgt Eddie Christie 'B'; Sgt Bill Miller
'B'; Sgt Bert Christie 'C'; Sgt Shufty Low (in the cheesecutter); Sgt Jake Clark 'B'; Sgt Norrie Dye; Sgt Rab
Smith 'HQ'; Sgt Ted Lawrence 'A'; FRONT - SQMS Dave Henderson 'A'; SSM Jimmy Strickland 'A'; SSM Jimmy King 'C';
SSM Bob Cameron 'B'; SSM Jock Campbell 'HQ'; RSM Jack Barnes 'HQ'; RQMS Dick Kerr 'HQ'; SSM Maurice Chandler 'HQ';
Sgt Alfie Upton 'HQ'; ? (only one unknown); Sgt Piper Wilson 'A'. | PHOTOGRAPH 1Z7: LBY sergeants
|
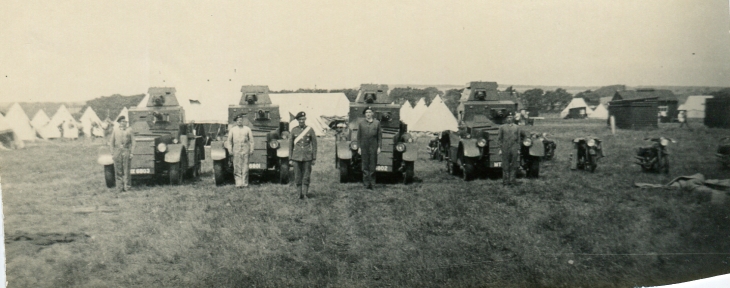
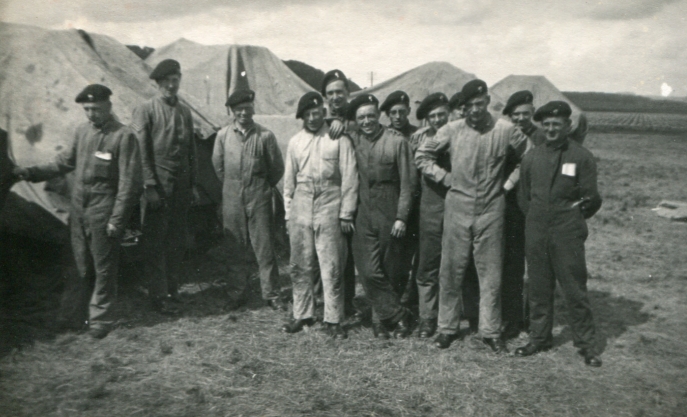
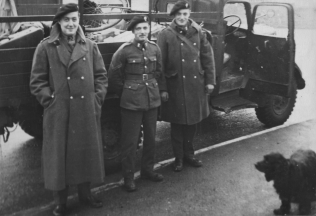
| LBY men undated with Matildas | PHOTOGRAPH 1Z8:
LBY men with Matildas
|
| A Matilda in the stables of Hopetoun House | PHOTOGRAPH 1Z9: Matilda tank at Hopetoun House stables
|
| LBY men | PHOTOGRAPH 1Z10: Men
|
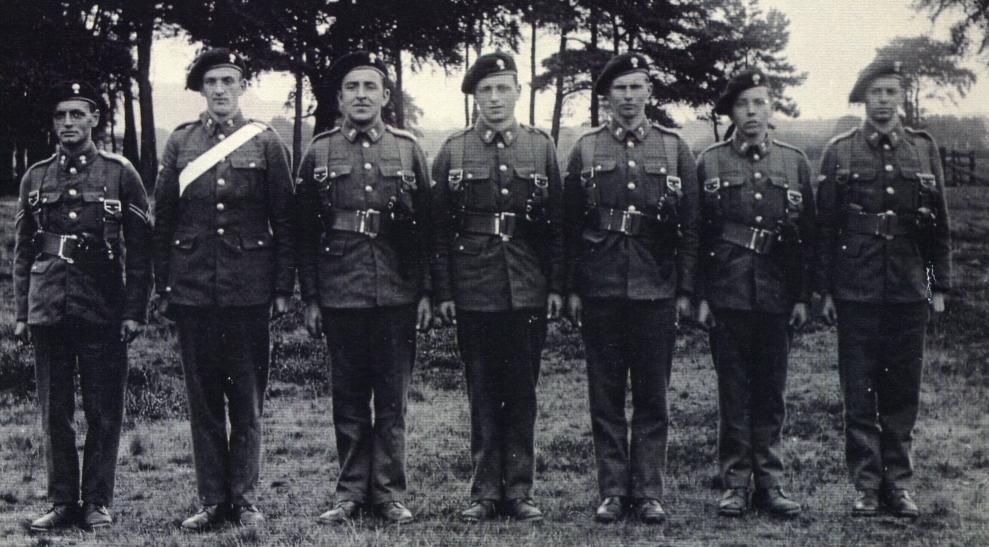
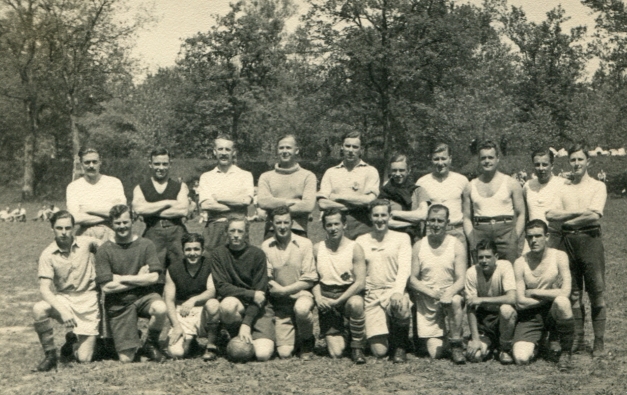
2. 'B' Squadron photographs
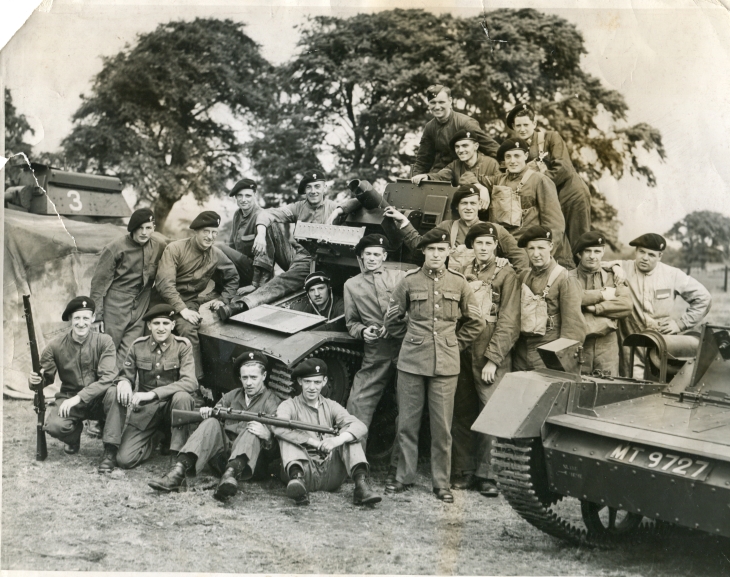
| Photograph of 'B' Squadron's Carrier Troop 3: L/Cpl Robson; Tpr W Deans; ?Tpr Jupp; ?; ? AND SITTING
Tpr R Kerr; Sgt W Jackson; Sgt D Henderson; Cpl Kennedy; ?; Tpr Joe Harper |
PHOTOGRAPH 2A: 'B' Squadron's 3 carrier troop
|
| Photograph of 'B' Squadron's Carrier Troop 4: Frank Stevenson; Tpr George Falconer; Tpr Mee; L/Cpl C White; Tpr White; ?; AND
SITTING L/Cpl W Laing; Sgt 'Piper' Wilson; Lt Baird; Cpl Ken Roberts; L/Cpl C Borthwick |
PHOTOGRAPH 2B: 'B' Squadron's 4 carrier troop
|
| Photograph of 'B' Squadron's Carrier Troop 6: Tpr Gordon Fortune; Tpr Sid Willis; Tpr Tabs Clithero;
NEXT Tpr Rab Whyte; Tpr Jimmy McPherson; Tpr Ian McKenzie; Tpr Charlie McKinney; NEXT L/Cpl Jock Gordon; Cpl Johnny C
Finlayson; TSM Jimmy Hogarth; Cpl Charlie Foley; Cpl Spud Murphy |
PHOTOGRAPH 2C: 'B' Squadron's 6 carrier troop
|
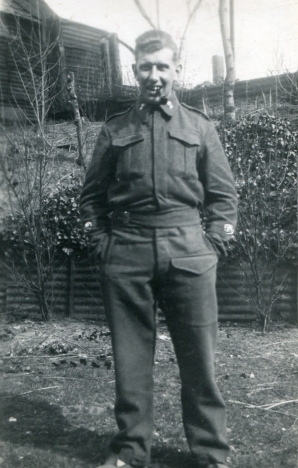
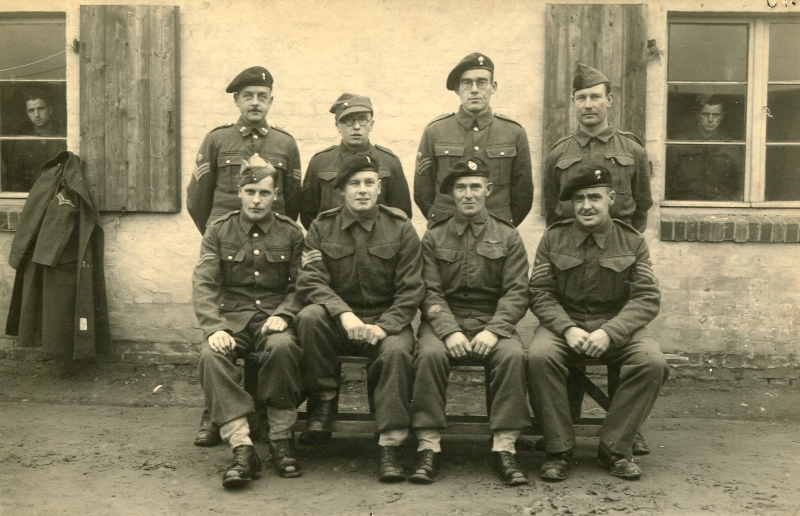
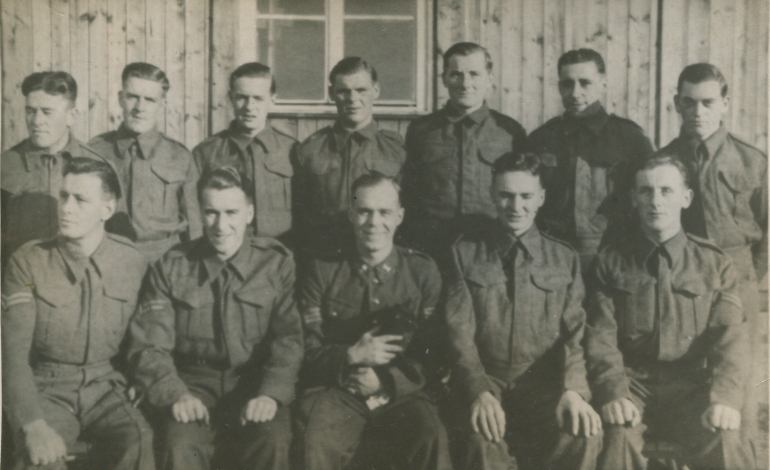
| Photograph of 'B' Squadron's Sergeants' Mess: Sgt D Henderson AND STANDING Sgt Ian Grant (KIA); Sgt W Jackson;
Sgt JD Clark; Sgt Eddie Christie; Sgt A Wilson (KIA); THEN Sgt Ernie Leeper; AND SITTING SQMS WB Biller; SSM AH Upton;
Sous-Lieut J Thouvenin (Liaison Officer) 7 Chasseurs; Major WJ McCulloch; TSM JM Hogarth; TSM T Kerr |
PHOTOGRAPH 2D: 'B' Squadron's Sergeants' Mess
|
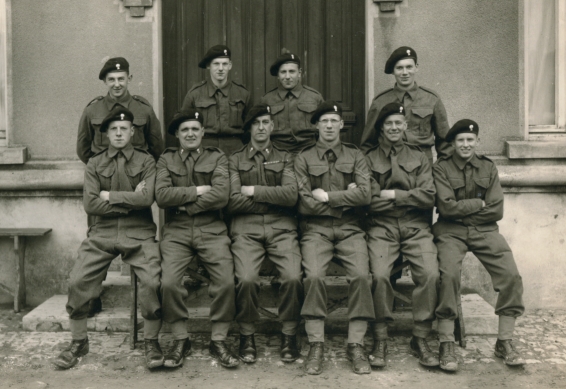
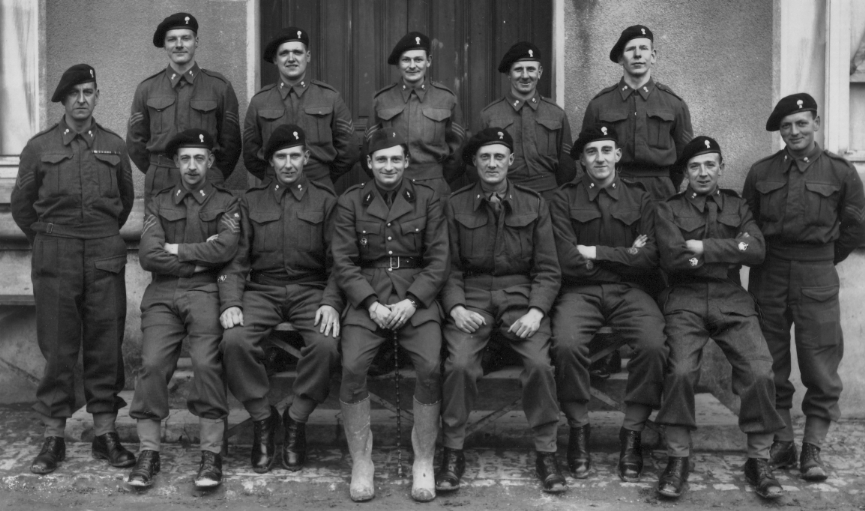
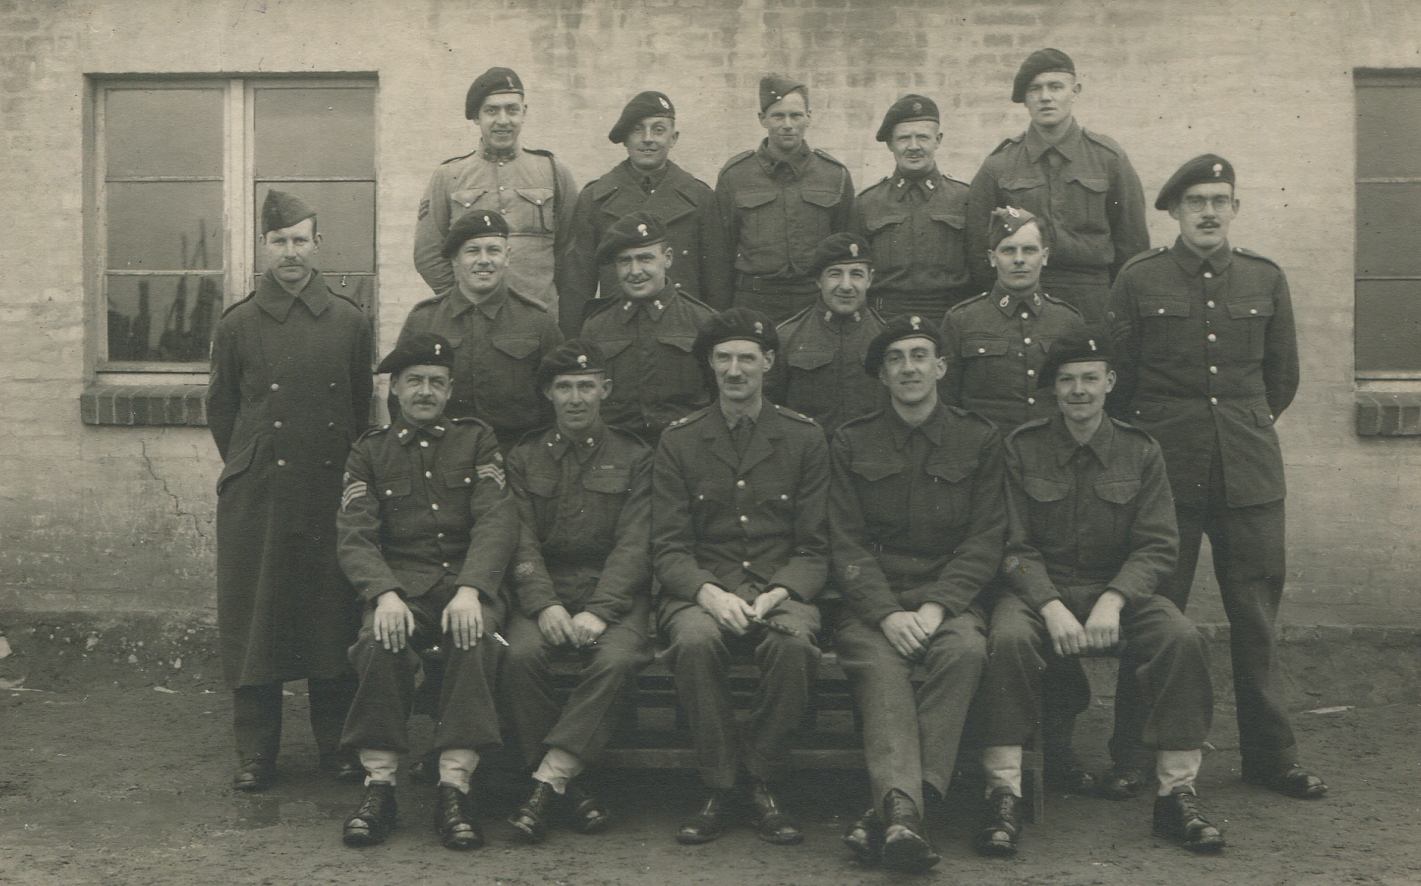
| Photograph of 'B' Squadron left half (Names on the document) |
PHOTOGRAPH 2E: 'B' Squadron (left half)
|
| Photograph of 'B' Squadron right half (Names on the document) |
PHOTOGRAPH 2F: 'B' Squadron (right half)
|
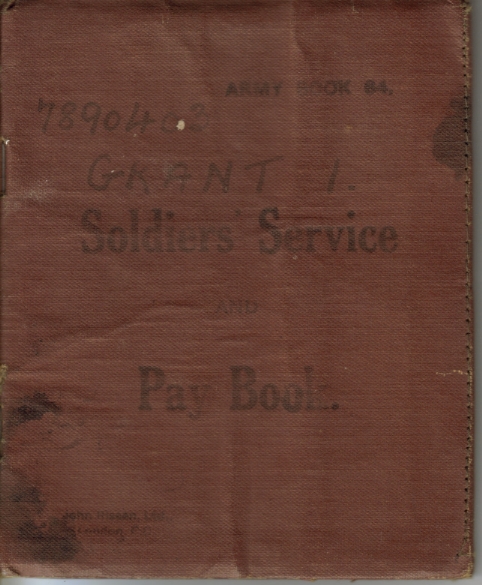
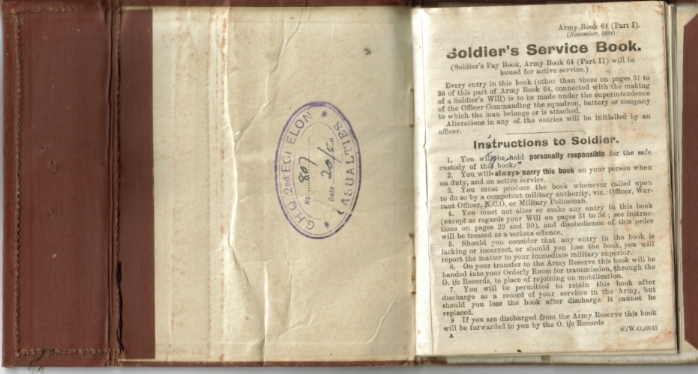
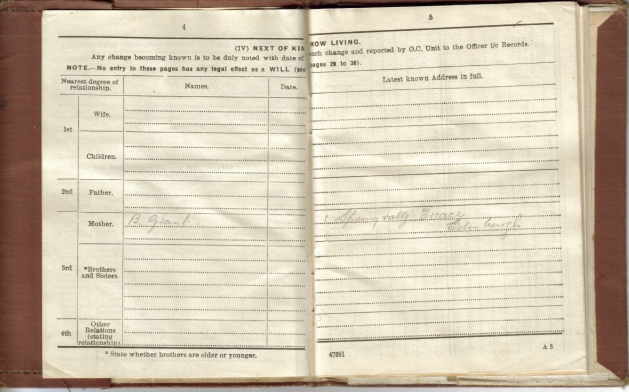
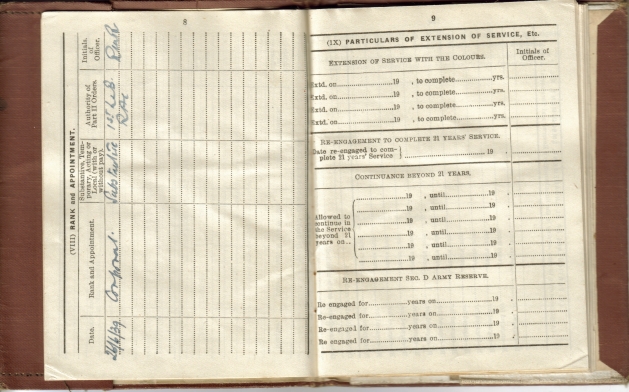
| Copies of Sgt Ian Grant's paybook to give an idea of what the paybooks looked like (courtesy of Alistair
Taylor) | PHOTOGRAPH 2G: Sgt Ian Grant's paybook
cover
|
| PHOTOGRAPH 2H:
Sgt Ian Grant's paybook page 1
|
| PHOTOGRAPH 2J:
Sgt Ian Grant's paybook pages 2 and 3
|
| PHOTOGRAPH 2K:
Sgt Ian Grant's paybook pages 4 and 5
|
| PHOTOGRAPH 2L:
Sgt Ian Grant's paybook pages 8 and 9
|
| PHOTOGRAPH 2M:
Sgt Ian Grant's paybook pages 18 and 19
|
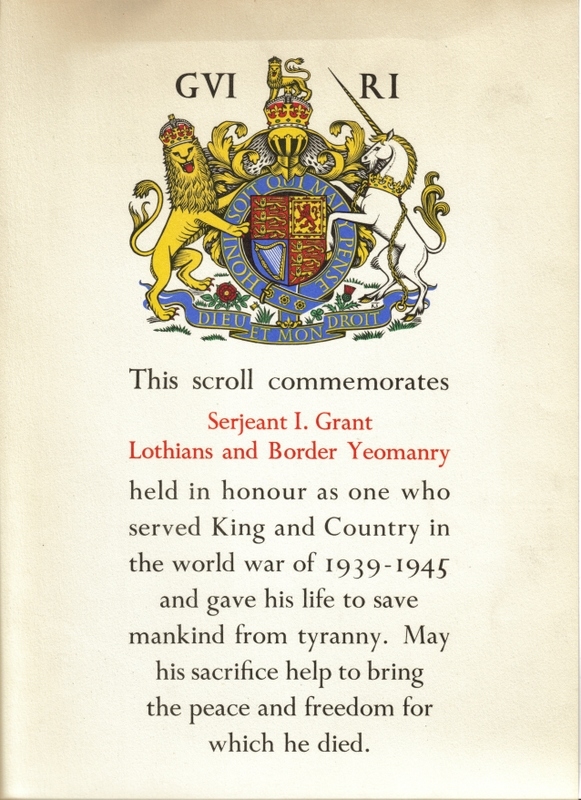
| PHOTOGRAPH 2N:
Sgt Ian Grant's scroll
|
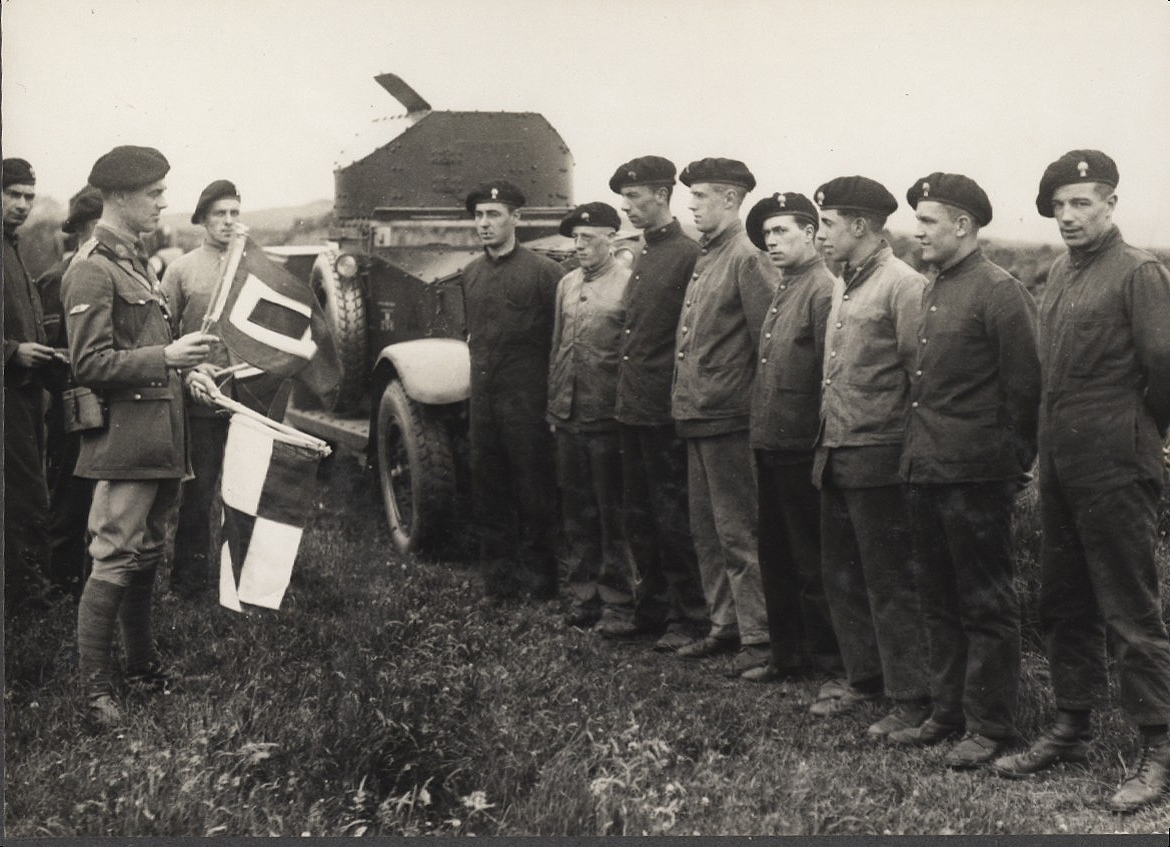
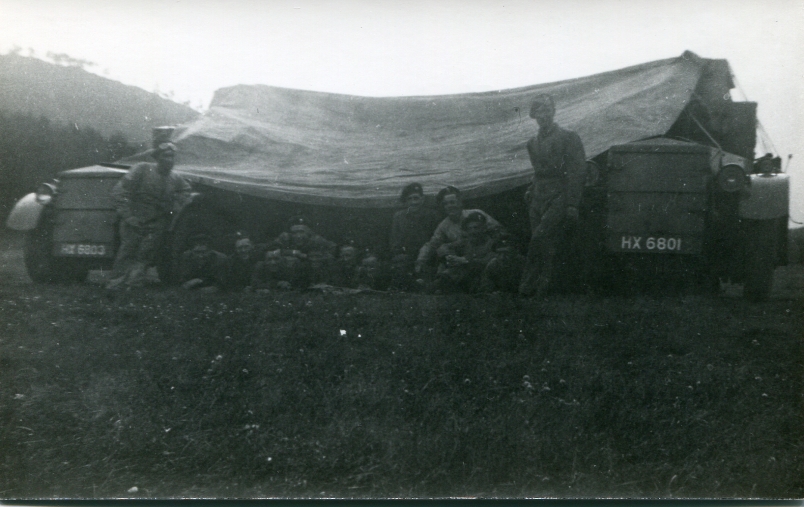
| 6 Carrier troop in post on the Maginot |
PHOTOGRAPH 2O: 6 Carrier troop in post on the Maginot
|
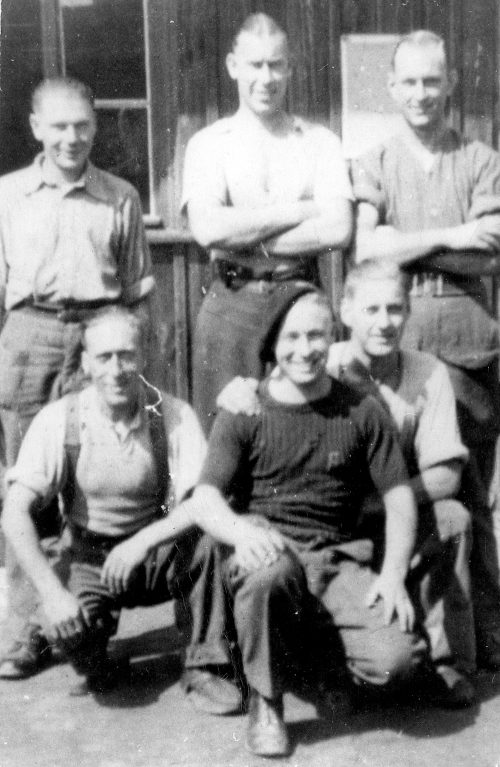
Individual photos of 'B' Squadron
| SSM Alfie Upton (then beccame POW): Picture taken Boiry St Martin in 1940 |
PHOTOGRAPH 2AA:
Alfie Upton 1940
|
| Bannockburn tank and crew (George Prior gunner/operator; Mick Shanley, Major McCulloch's batman; Arthur
Symington driver; Maj McCulloch commander behind the lens) before it was burned out at Cany on 10 June 1940;
photo taken in the Maginot |
PHOTOGRAPH 2AB:
Bannockburn
|
| Corporal Heath, the cook, taken on the Maginot |
PHOTOGRAPH 2AC: Corporal Heath
|
| Charlie Hopetoun |
PHOTOGRAPH 2AD: Charlie Hopetoun
|
| Ian Pitman and Pat Turcan |
PHOTOGRAPH 2AE: Ian Pitman and Pat Turcan
|
| David Jardine, Jo Hume, Harold Ford |
PHOTOGRAPH 2AF: David Jardine, Jo Hume
and Harold Ford
|
| Jo Hume |
PHOTOGRAPH 2AG: Jo Hume
|
| Johnny Finlayson |
PHOTOGRAPH 2AH: Johnny Finlayson
|
| Johnston |
PHOTOGRAPH 2AJ: Johnston
|
| Kenneth Spreckley |
PHOTOGRAPH 2AK: Kenneth Spreckley
|
| Freddie MacDonald, Cpl Ernie Leeper, Tpr Garden |
PHOTOGRAPH 2AL: Freddie MacDonald
, Ernie Leeper, TprGarden
|
| Wattie McCulloch, Ian Pitman, Pat Turcan, Donald McIntosh, Robert Baird |
PHOTOGRAPH 2AM:
Wattie McCulloch, Ian Pitman, Pat Turcan, Donald McIntosh, Robert Baird
|
| Freddie McDonald and Padre Rankin |
PHOTOGRAPH 2AN: Freddie McDonald and Padre
Rankin
|
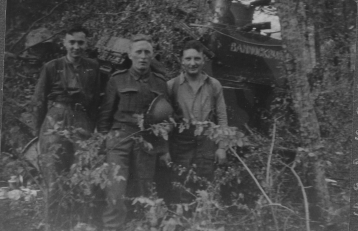
| Tpr Melville; Sgt J Cameron;?; Tpr King;? |
PHOTOGRAPH 2AO: Tpr Melville,
Sgt J Cameron,- Tpr King -
|
3. 'A' Squadron photographs
| A Squadron on the way to church, England 1939 |
PHOTOGRAPH 3A:
A Squadron on the way to church England 1939
|
Individual photos of 'A' Squadron
| Tony Chambers |
PHOTOGRAPH 3AA: 2/Lt Tony Chambers
|
4. 'C' Squadron photographs
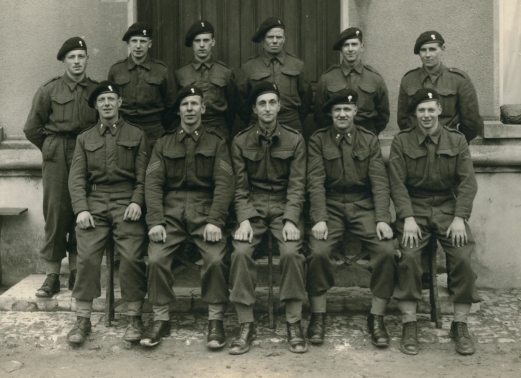
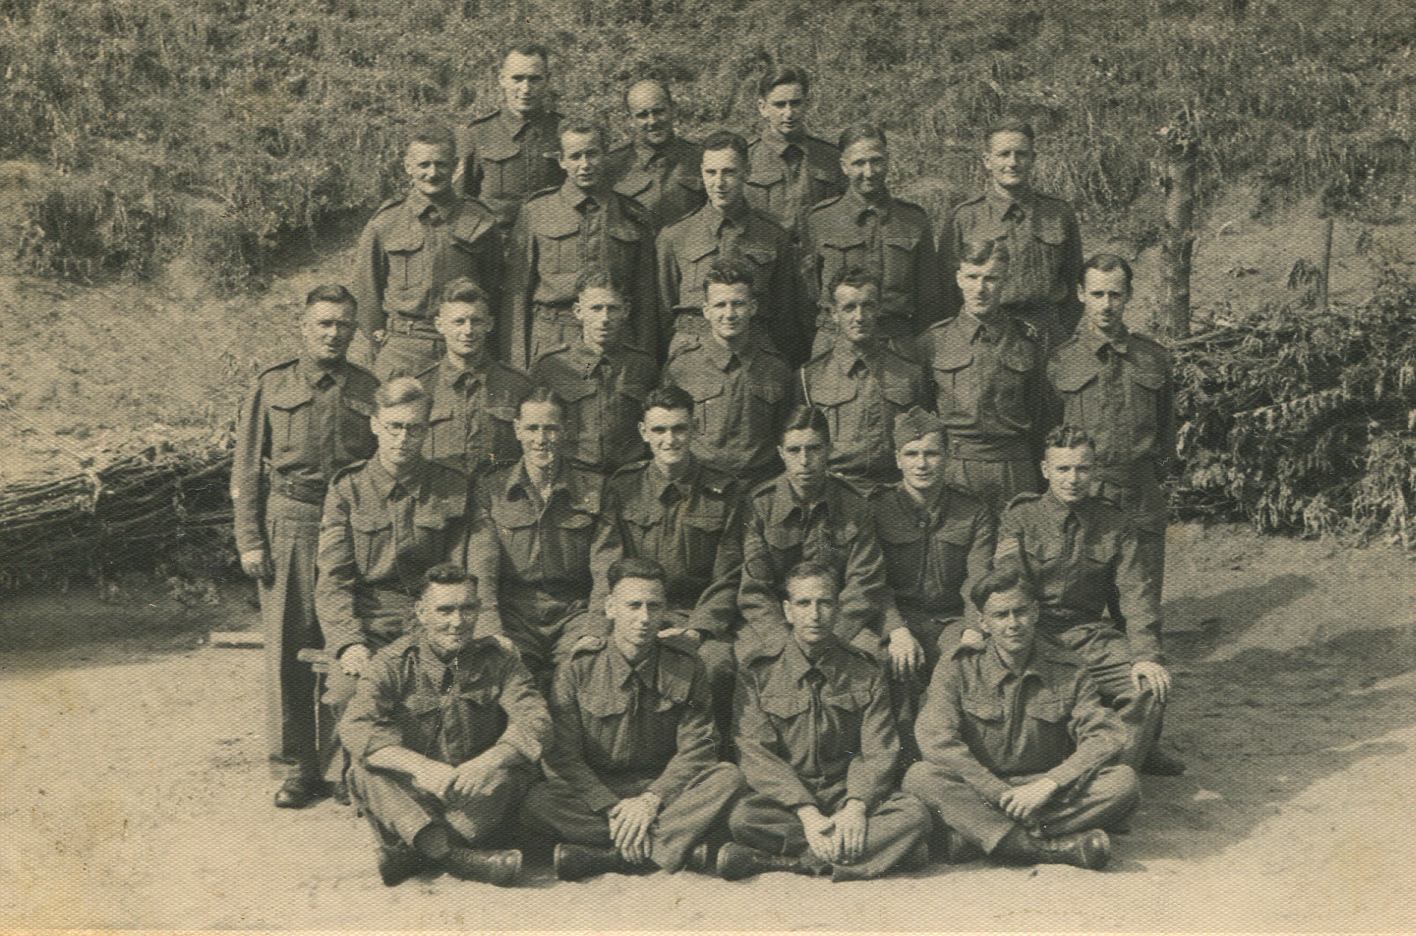
| Photograph of 'C' Squadron left half |
PHOTOGRAPH 4A:
C Squadron left half
|
| Photograph of 'C' Squadron right half |
PHOTOGRAPH 4B:
C Squadron right half
|
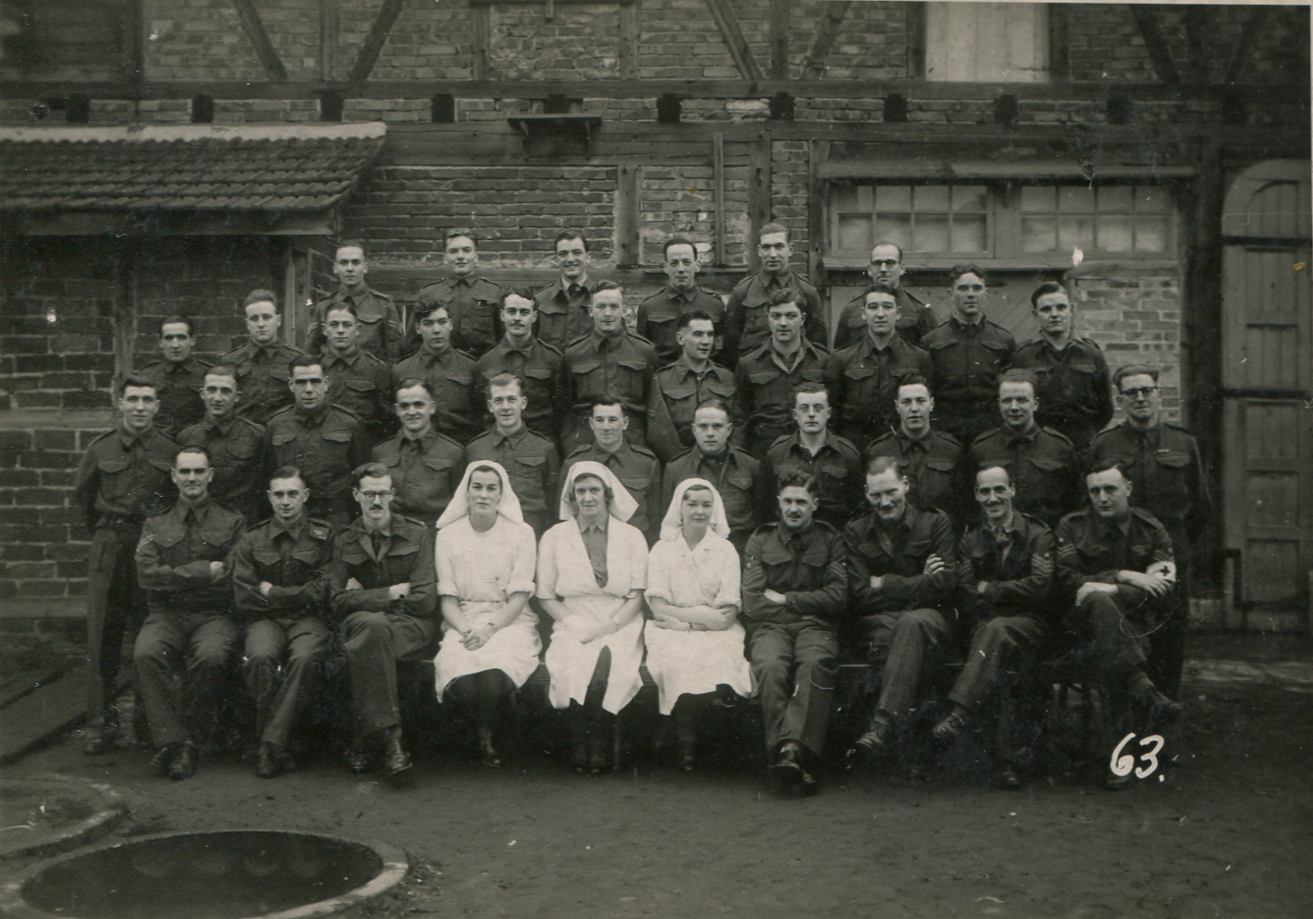
5. HQ Squadron photographs
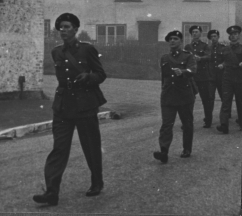
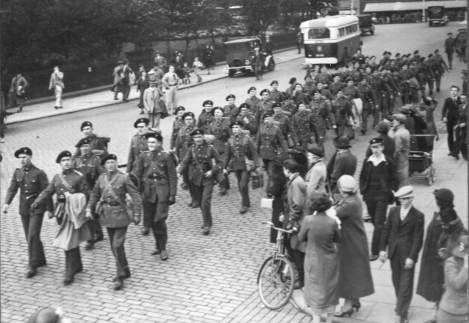
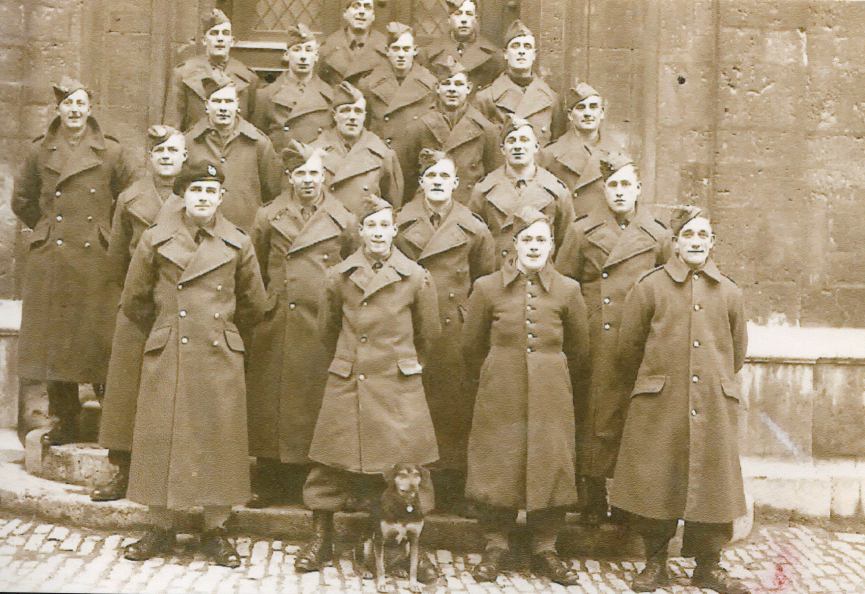
| HQ Squadron on the way to Waverley in 1939 |
PHOTOGRAPH 5A:
HQ Squadron marching to Waverley 1939
|
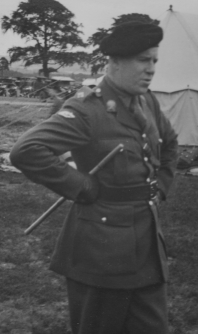
| Jack Barnes |
PHOTOGRAPH 5B: Jack Barnes
|
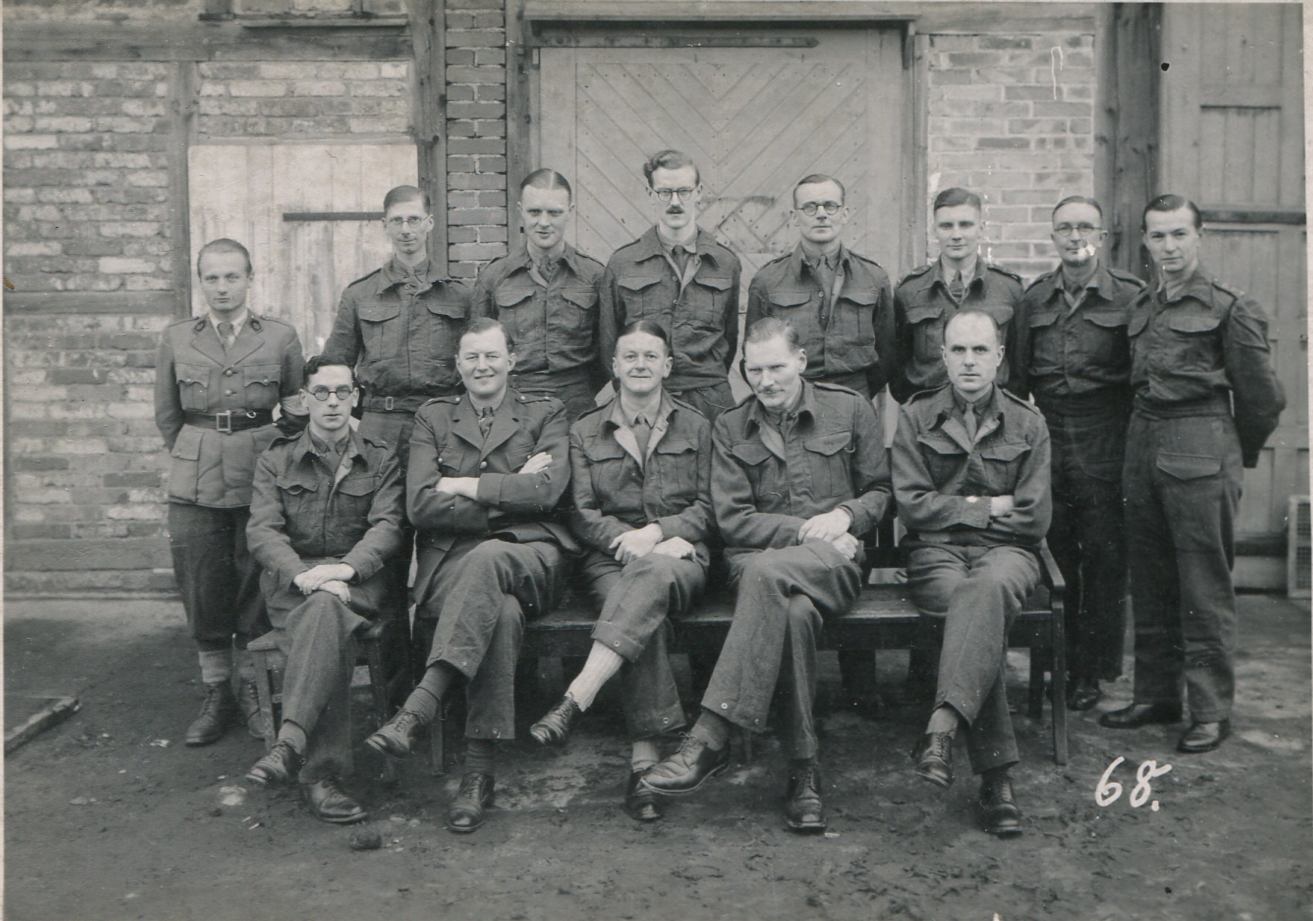
6. RHQ photographs
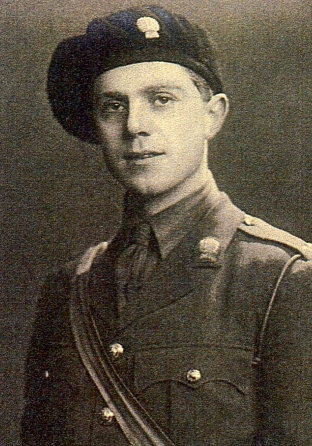
| Padre Rankin |
PHOTOGRAPH 6A:
Padre Rankin
|
7. During the war
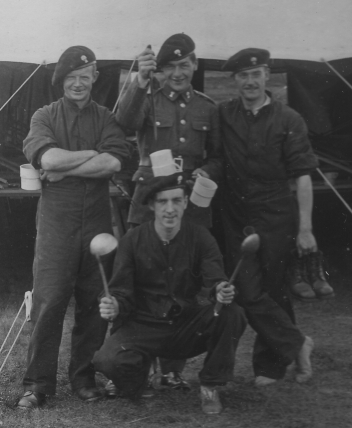
| Cookhouse staff |
PHOTOGRAPH 7A: Cookhouse staff
|
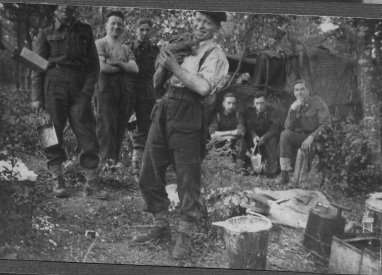
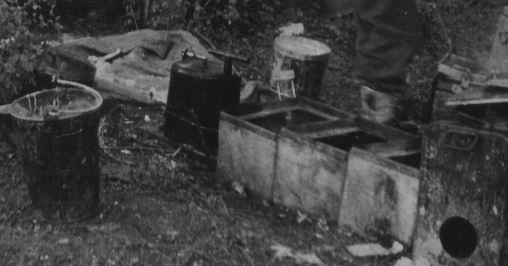
| Cookhouse paraphernalia (taken on the Maginot) |
PHOTOGRAPH 7B: Cookhouse equipment
on the Maginot Line
|
| On the Maginot: Jim Johnston; Frank Stewart; Sgt Major Upton; Sgt Henderson (with beer) |
PHOTOGRAPH 7D: On the Maginot
|
| Photograph of the chateau Caiville taken 8 June 1940 when it was HQ for the 51st Highland Division |
PHOTOGRAPH 7D: Cailleville chateau 1940
|
| Group of wounded soldiers or representatives of dead soldiers after repatriation of wounded soldiers in
1943: BACK - W Lawson; Mrs THorburn-Brown; Ginger Gartland; ?; W Rodger; Mrs Younger; Stevie Stevenson; FRONT:
Leacock; Col Ansell; J Hogarth | PHOTOGRAPH 7E:
Group of repatriated soldiers 1943 |
8. During the war - IWM Colelction
The Imperial War Museum in London holds a number of photographs, documents etc. pertaining to the War and the Lothians.
A number of photographs are available, taken during the War in April 1940 while the Lothians were billeted in the Arras area.
The webmaster has applied for a license to reproduce the photos on this website.
The photos appear to have been taken of 'HQ' Squadron at Ayette.
In the meantime, here is a list of the photos:
F3513
F3514
F3515
F3516
F3517
F3518
F3519
F3520
F3521
F3522
F3523
F3524
F3525
F3526
F3527
F3528
F3529
F3530
F3531
F3533
F3535
F3536
F3537
F3538
F3539
RML342
RML350
RML355
RML358
RML363
RML367
RML373
RML397
RML399
.
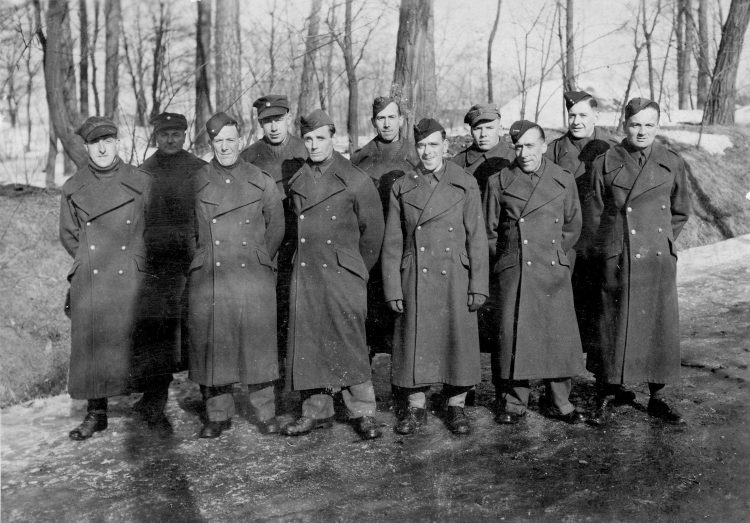
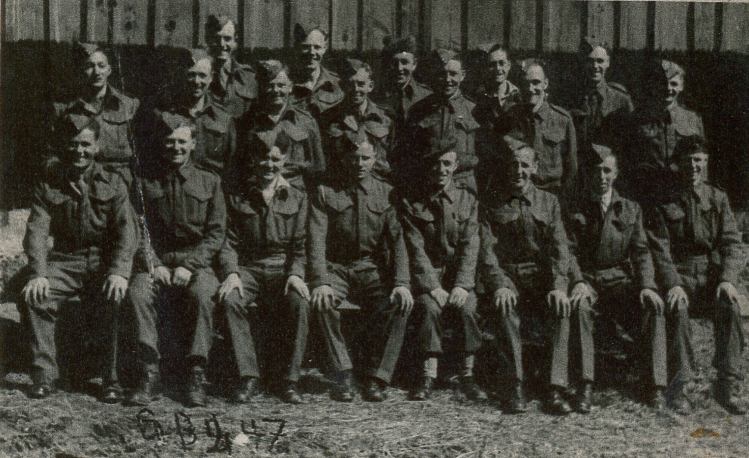
9. POWs during the war
Stalag 383 Hohenfels
| STALAG: 383 Hohenfels with - back row: Ian McDougall; ?; Bert Christie; Jimmy McKenna; Tam Bowie;
Freddie Laws; Bill Miller; Hughie Cairncross. Middle row: ?; Tommy Kerr; Dick Kerr; Paddy Leckie; Bill Brydon.
Front row: Arthur Symington; ?; Jimmy Auld; Sandy Fairley. |
PHOTOGRAPH 8A1: Stalag 383 with 17 men
|
| 1st Lothians in STALAG 383 |
PHOTOGRAPH 8A2B: Lothians in Stalag 383
|
| Wrestling team in STALAG 383: Second row (seated) 3rd=Joe Dodds; far right = Larry Aspey |
PHOTOGRAPH 8A3: Wrestling team in Stalag 383
|
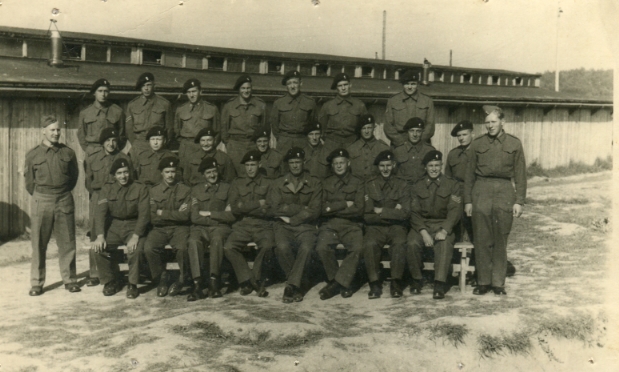
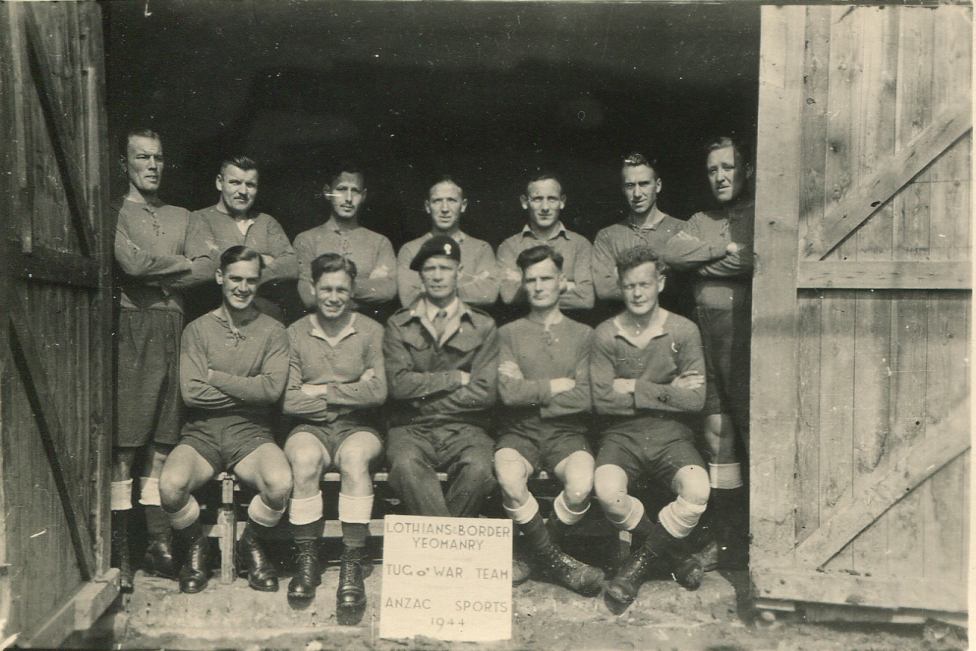
| Tug of War team 1944 in Stalag 383: Back: Cpl McKenna, Sgt Dodds, Cpl Davidson, TSM Kerr, Cpl Aspey,
Cpl Cunningham, Cpl Clark; Front - Cpl Brydon, Sgt Grieve, RSM Kerr, Cpl Finney, Sgt Leckie. |
PHOTOGRAPH 8A4:
Tug of war team 1944 in Stalag 383
|
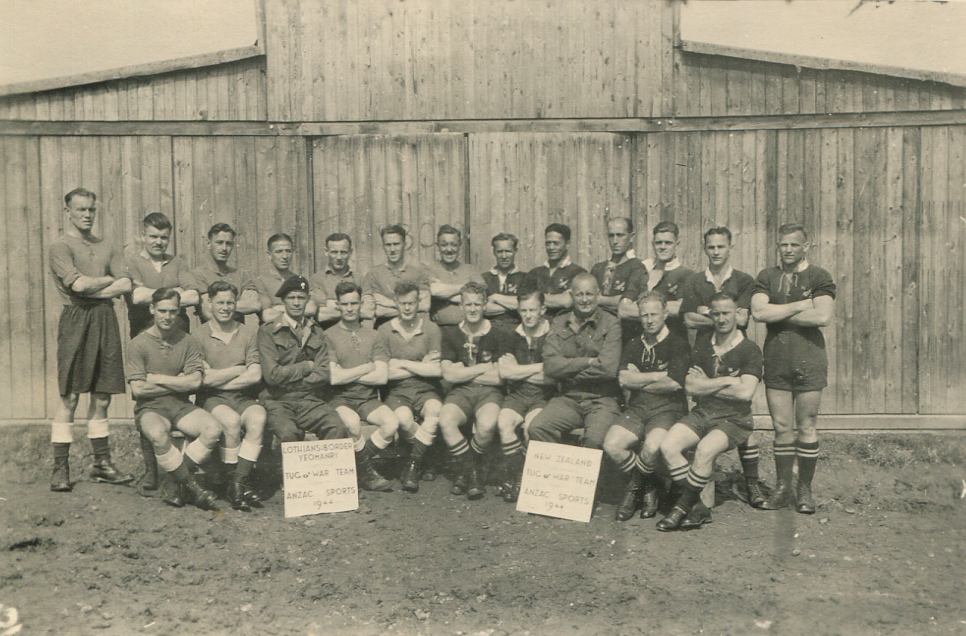
| Tug of war finalists: 1st Lothians and New Zealand |
PHOTOGRAPH 8A5: Tug of war team finalists 1st Lothians and NZ in Stalag 383
|
| Hugh Cairncross and Joe ? |
PHOTOGRAPH 8A6: Hughie Cairncross and Joe in Stalag 383
|
| 383 on 12 June 1943: The Lothian 4th right in the second row is Jimmy Auld |
PHOTOGRAPH 8A7: 383 on 12 June 1943
|
Stalag 8b Silesia
| Stalag 8b. BACK: Willie Scott; ?; SQMS Freddie Laws; Sgt Wiseman (Signals). FRONT: Signals chap; Bobby Grieve;
Jock Campbell; SQMS Hughie Cairncross. |
PHOTOGRAPH 8B1: Stalag 8b
|
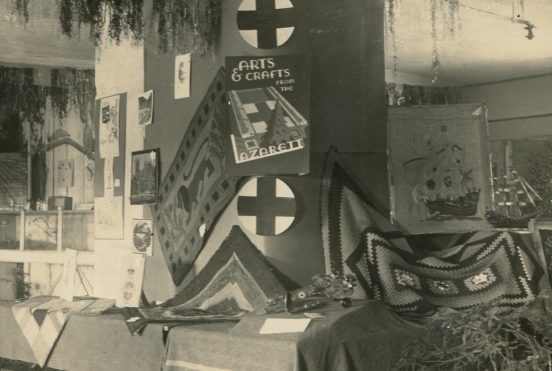
| Stalag 8b. Crafts Exhibition |
PHOTOGRAPH 8B2: Stalag 8b Craft Exhibition
|
| Stalag 8b October 1941 with Hugh Cairncross |
PHOTOGRAPH 8B3: Stalag 8b in October 1941 with
Hugh Cairncross
|
| Stalag 8b: May 1942 with the Colonel: BACK: Freddie Laws; Hughie Cairncross; Bobby Grieve; Willie Scott;
Jock Campbell; MIDDLE: last - Wiseman; FRONT: ?; ?; Col Mike Ansell; J Hogarth; Rab Stewart |
PHOTOGRAPH 8B4: Stalag 8b with Col Mike
|
Stalag 20A Thorn
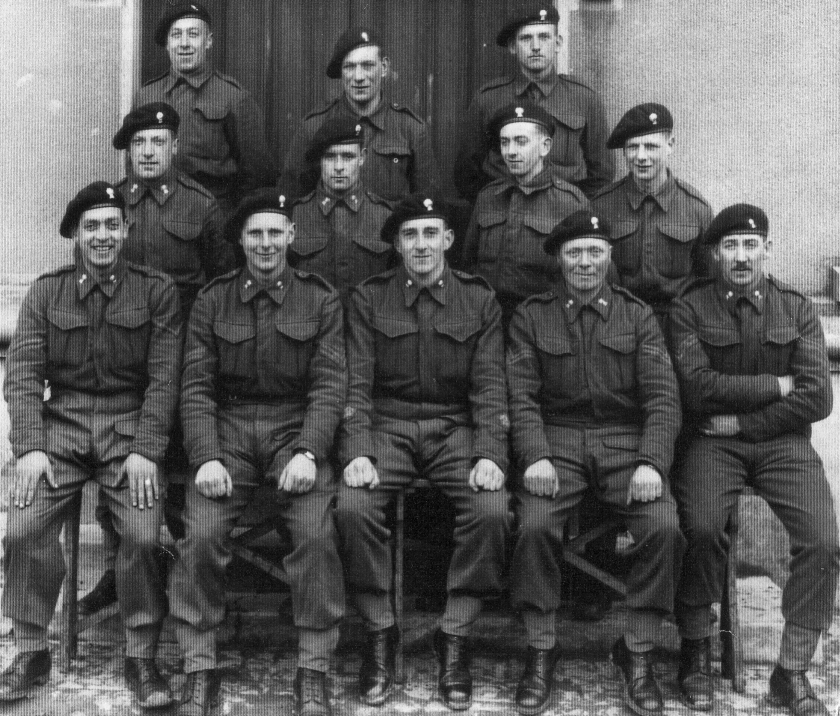
| Lothians Officers in Thorn 1941. BACK: ? ; AS Chambers; Dr Robert 'Binks' Inch; ?; FRONT: Dennis Flowers;
Pat Turcan; Harold Ford. |
PHOTOGRAPH 8C1:
Lothians officers in Thorn 1941
|
| XXA 8 Jan 43 (note this photo was also labelled 3c) |
PHOTOGRAPH 8C2:
XXA on 8 January 1943
|
Stalag 21B Poland
| 1942 in 21B (Poland): Back row 6th = Tpr Findlay; Front row = Cpl Davidson, Cpl Crawford, Sgt Ford,
Tpr G Prior, Cpl Aspey |
PHOTOGRAPH 8D1: Lothians men in 21B Poland
|
Stalag 9C
| Stalag 9C: Jack Allan left front (No other LBY in photo) | PHOTOGRAPH 8E1: Jack Allan in 9C |
| Stalag 9C: Jack Skene in beret and Jack Allan 2nd to his left (No other LBY in photo) |
PHOTOGRAPH 8E2: Jack Skene and Jackie Allan in 9C |
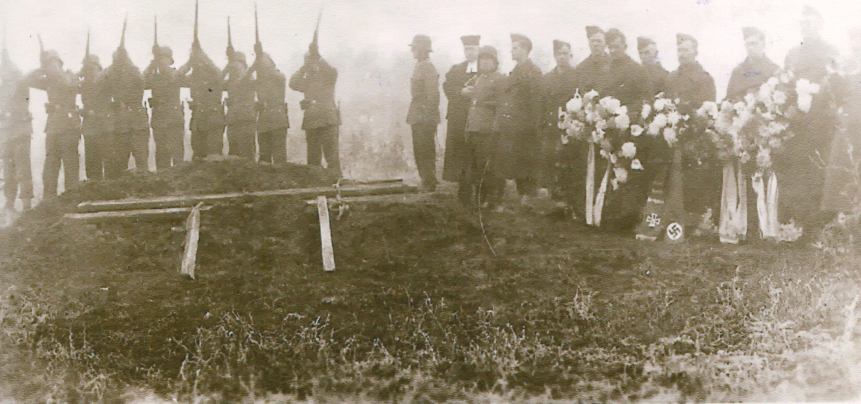
| Stalag 9C: POW funeral | PHOTOGRAPH 8E3: POW funeral in 9C |
| Stalag 9C: Jack SKene left and Jack Allan right, both with berets (No other LBY in photo) |
PHOTOGRAPH 8E4: Jack Skene and Jack Allan in 9C |
| Stalag 9C |
PHOTOGRAPH 8E5: John Stevenson in 9C |
| Stalag 9C |
PHOTOGRAPH 8E6: John Stevenson in 9C |
Stalag 9A
| Stalag 9A |
PHOTOGRAPH 8F1: Stalag 9A
|
Miscellaneous
| The 3 padres: Padre McInnes (Camerons); Padre Rankin (1st Lothians); Padre Hunter (1st Gordons) |
PHOTOGRAPH 8Z1: the 3 padres
|
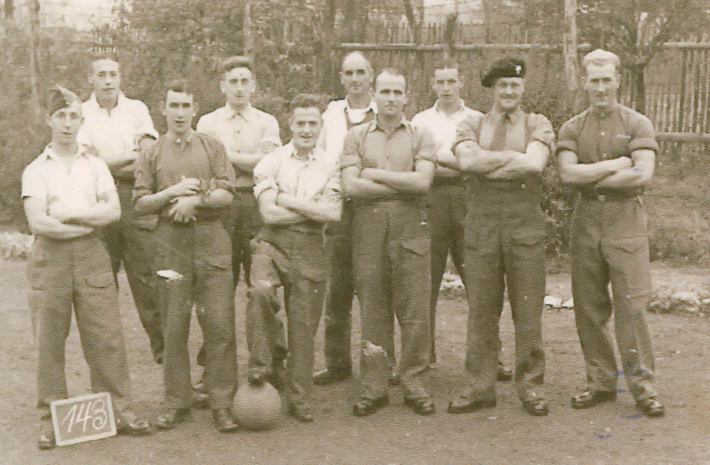
| Rugby matches: Scotland v Wales and England v Ireland |
PHOTOGRAPH 8Z2: Rugby teams
|
| Unknown Stalag, possibly 7A |
PHOTOGRAPH 8Z3: Possibly Stalag 7A: Alf Black
kneeling in front on the right
|
| Unknown Stalag, working party. Four are wearing Polish caps. It also looks like they are all wearing
new greatcoats, possibly issued from Stalag stores via the Red Cross. |
PHOTOGRAPH 8Z4: Working party: Alf Black
second from right
|
| Unknown Stalag: Trooper John McKay middle row, third from left. |
PHOTOGRAPH 8Z5: Stalag: John McKay
|
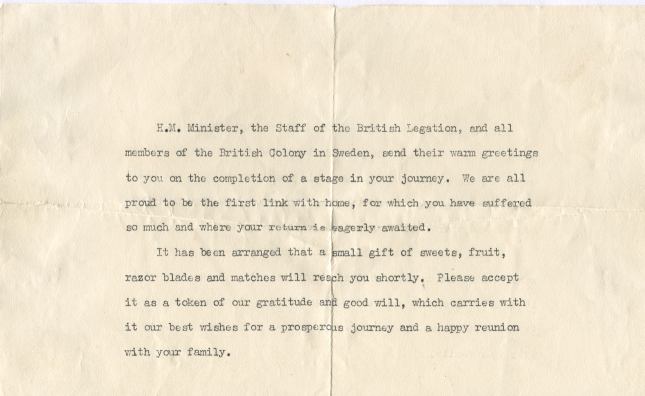
10. Repatriation 1943
A repatriation was due to have taken place in 1942, but there were more wounded British prisoners of war than Germans
in Britain and so Hitler wanted the rest of the numbers made up in captured submariners etc. Churchill refused and so
the wounded British prisoners, already in neutral territory, were turned back and separated into other POW camps.
Finally repatration took place in 1943. Among the wounded were the blinded Lt Col Ansell, CO of the Lothians, and
some of his men.
| These are the words that greeted the repatriated prisoners on the ship |
PHOTOGRAPH 9A1: Welcome aboard repatriation ship
|
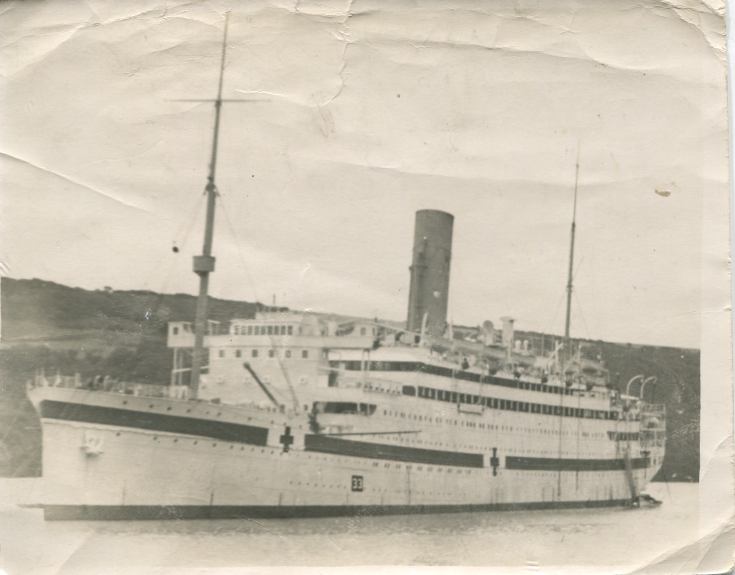
| The repatriation ship |
PHOTOGRAPH 9A2: The repatriation ship
|
11. After the war
The Lothians took part in many reunions and there were many newspaper articles written about them.
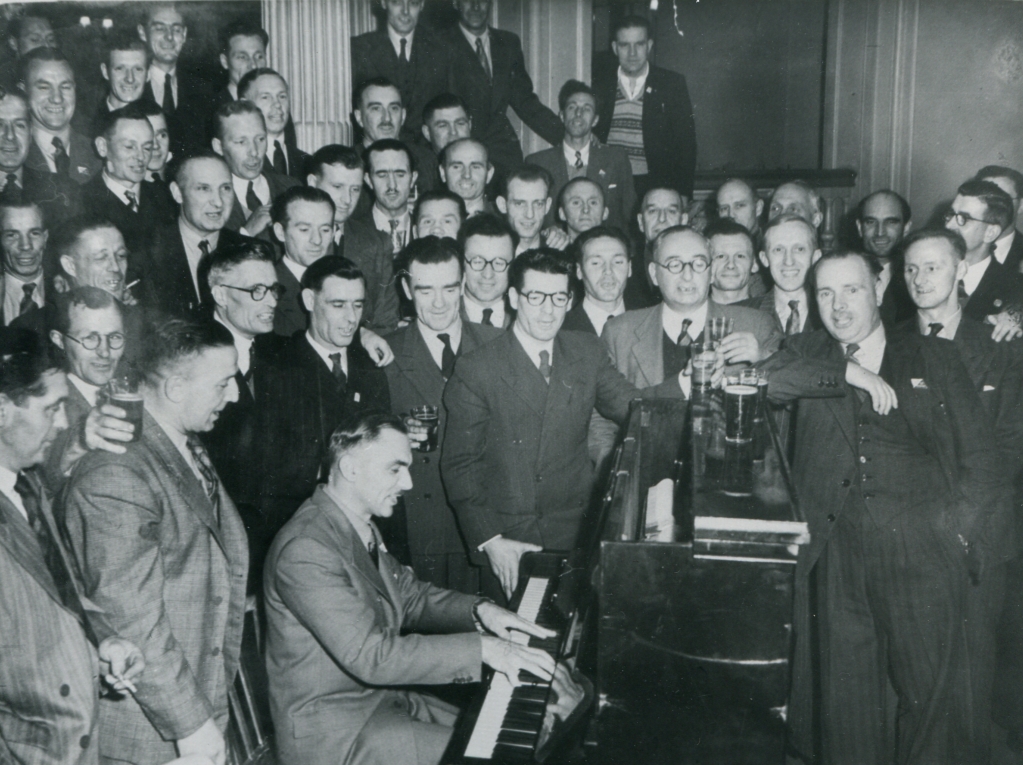
Reunion in the 1950's
| Reunion in the 1950s: Bert Hogg at the piano; standing behind him is Tommy Kerr; Bobby Monteith with the cigarette to
Tommy Kerr's left and behind; then across to the viewer's right next to Bobby Monteith are Wee Andy (with glasses)
who drove the Squadron truck; Jimmy McPherson; Paddy Cox; and George Leacock (with glasses). William Dunbar is behind
the left shoulder of the man at the top end of the piano in glasses and a light suit and holding a drink.
The first full face
in the top left of the photo is Alex Hogg, Jake Clark is standing diagonally in front of him and Arthur Symington
is diagonally in front of Jake Clark. Bobby Grieve is the partly obscured face to the top left of the pillar. The
second full face to the right of the pillar and down is Safety Fraser and to his left is Jackie Allen. |
PHOTOGRAPH 10A1:
Reunion in the 1950's
|
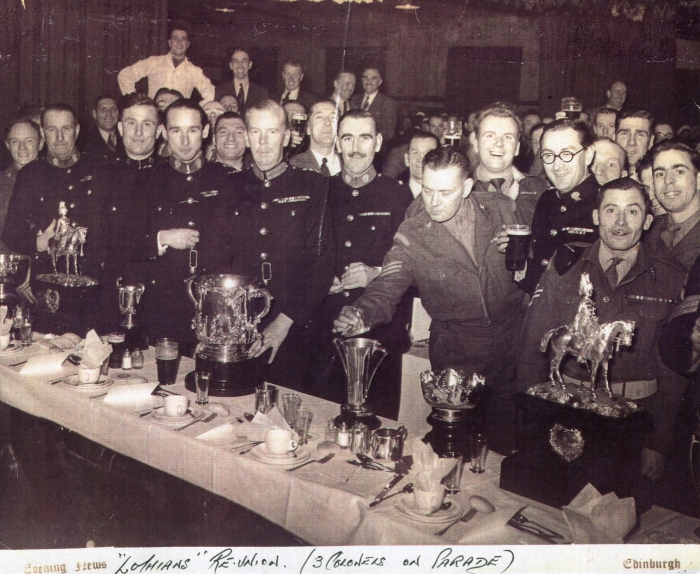
| This newspaper photograph also shows some of the Regimental silver |
PHOTOGRAPH 10A2:
Evening News: 3 colonels on parade
|
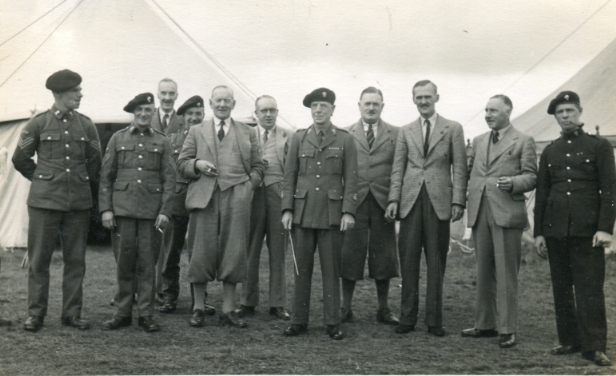
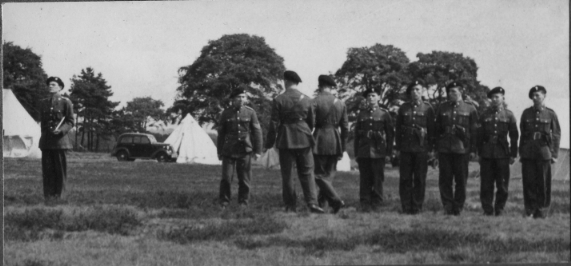
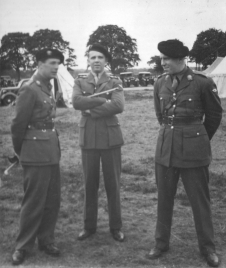
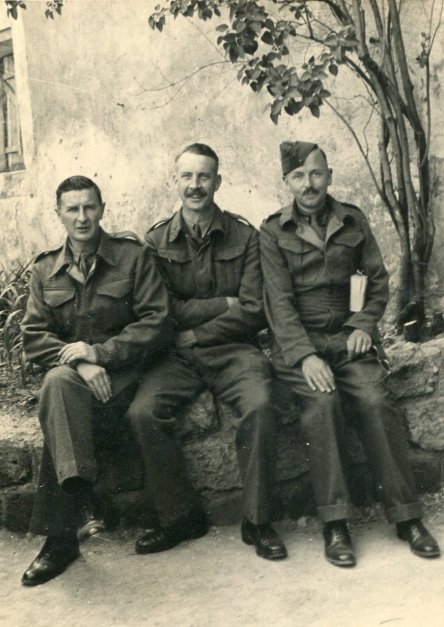
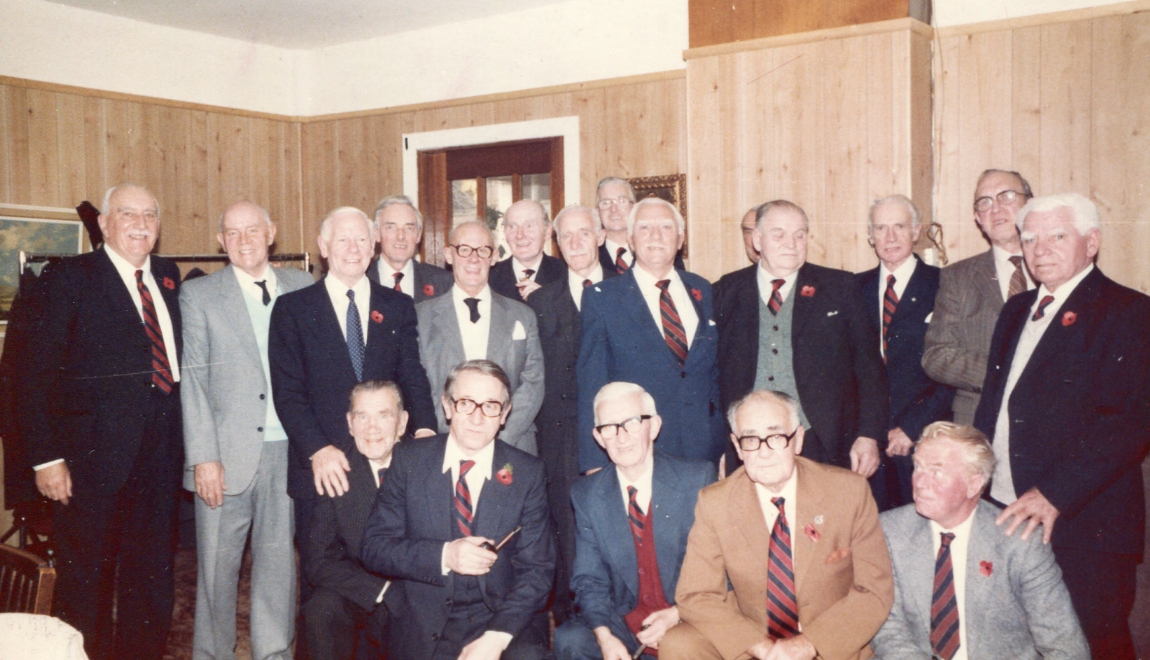
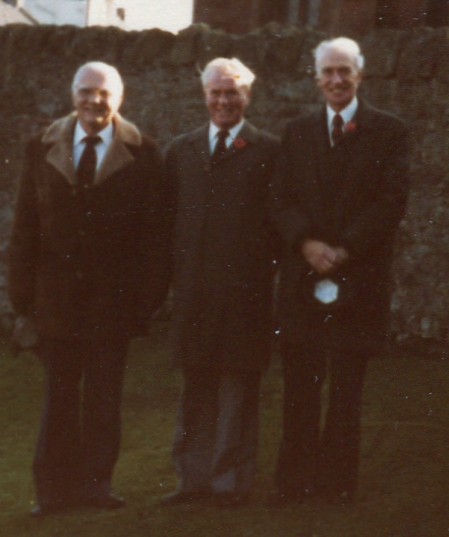
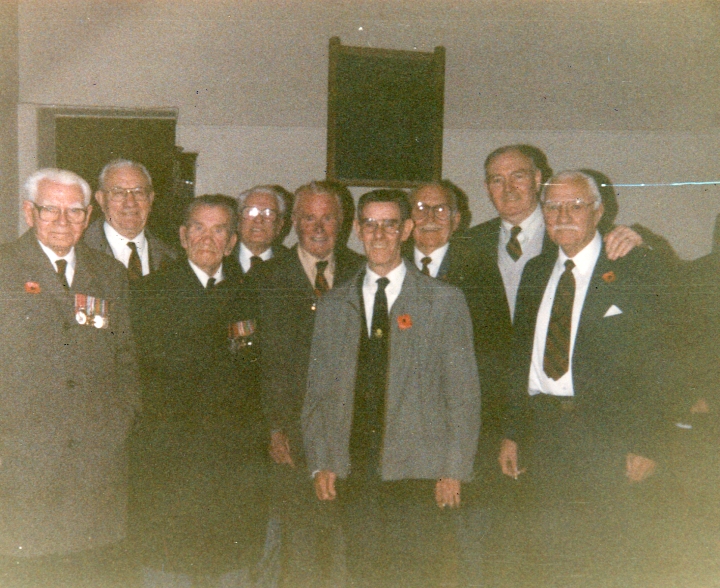
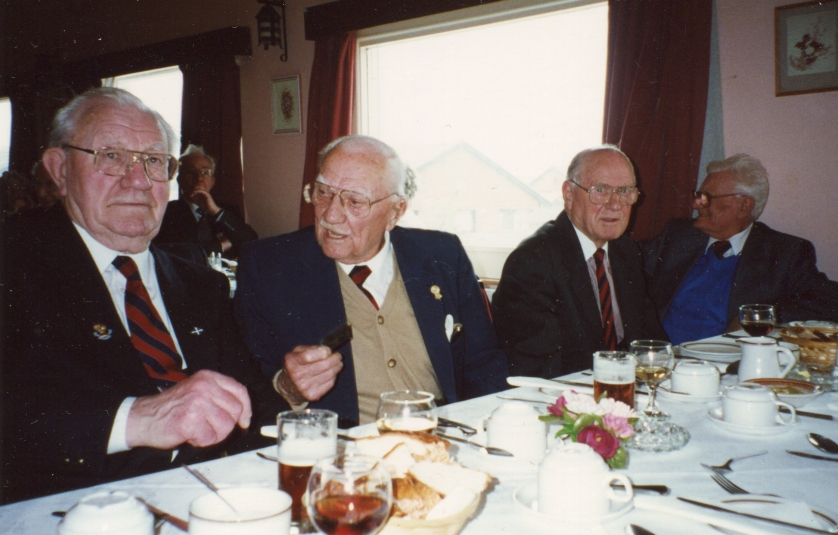
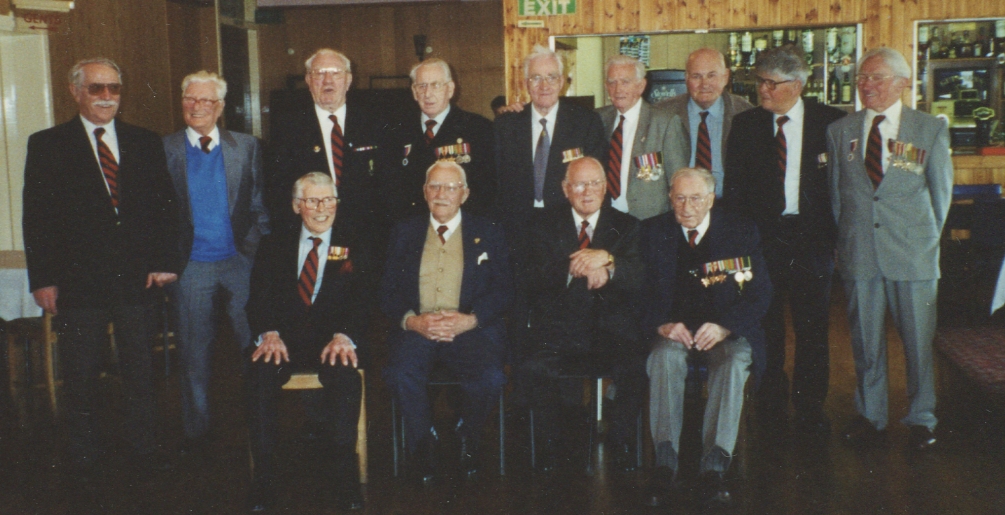
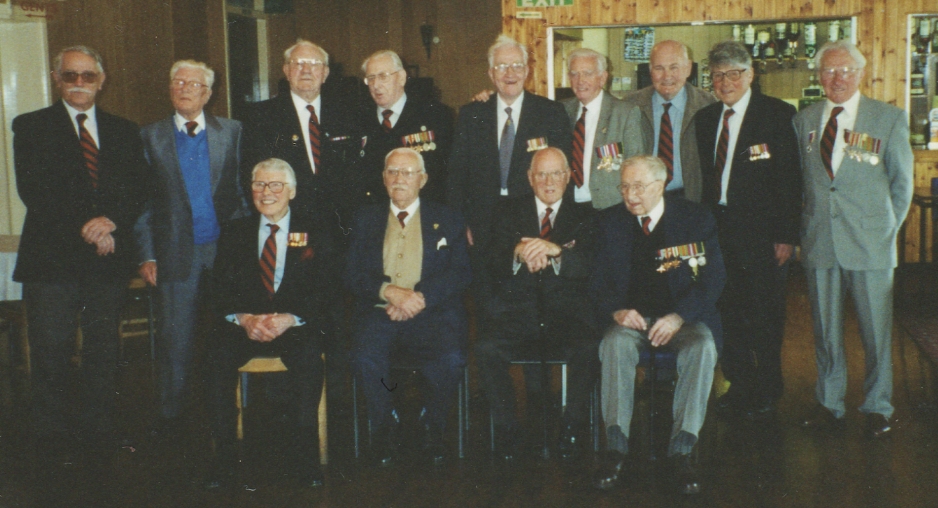
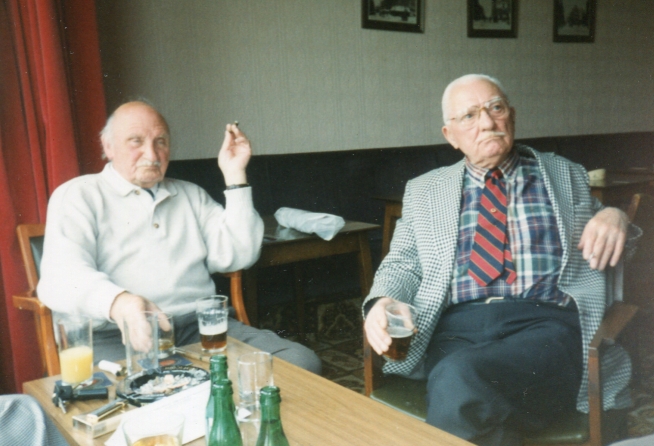
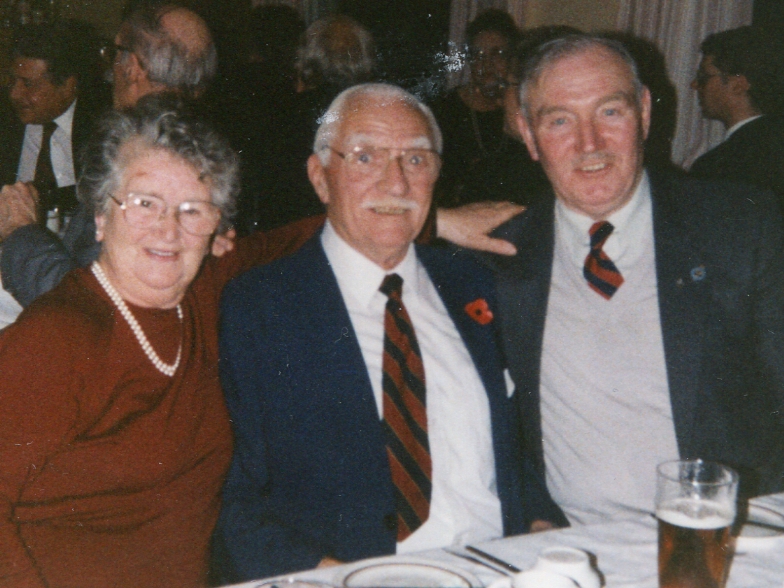
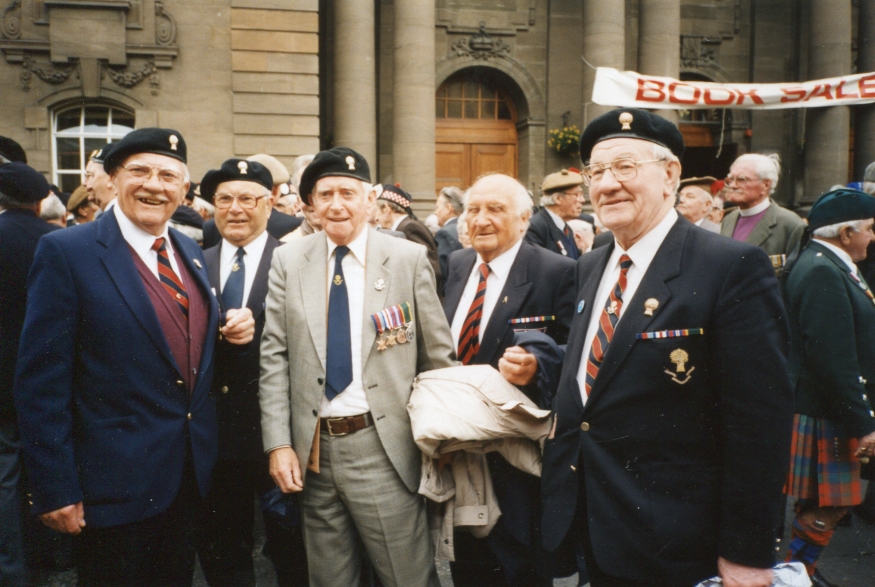
Reunion in the 1980's
Most of the reunions took place in Dunbar. The Lothians and their families would gather on Remembrance Day in the
church hall and would march to Dunbar Parish Church for a ceremony.
PHOTOGRAPH 10B1:
Reunion in the 1980's
PHOTOGRAPH 10B2:
Three men in the grounds of Dunbar church
PHOTOGRAPH 10B3: Reunion of men
PHOTOGRAPH 10B4: Reunion of men
PHOTOGRAPH 10B5: Reunion of men
PHOTOGRAPH 10B6: Reunion of men
PHOTOGRAPH 10B7: Reunion of men
PHOTOGRAPH 10B8: Arthur Symington and Bert Hogg
PHOTOGRAPH 10B9: Reunion of men
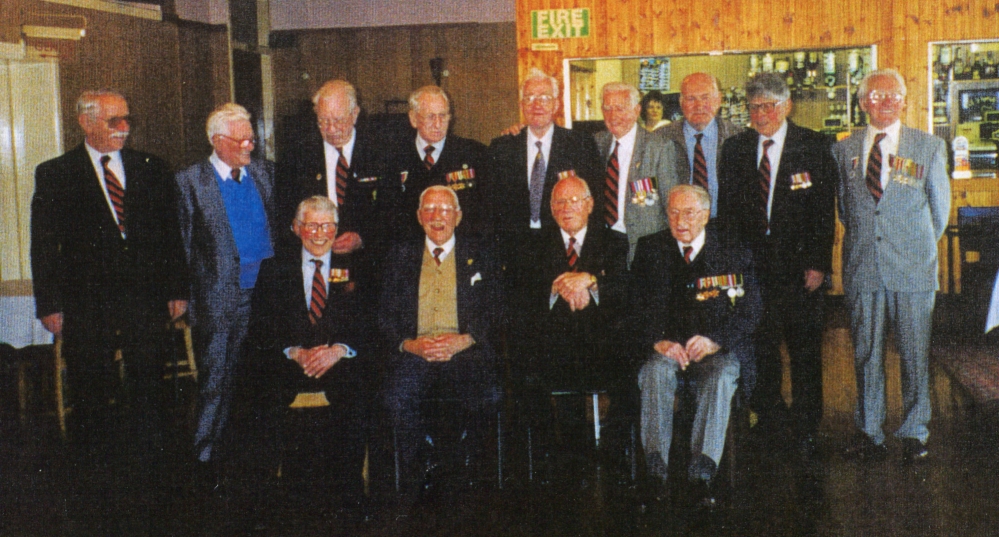
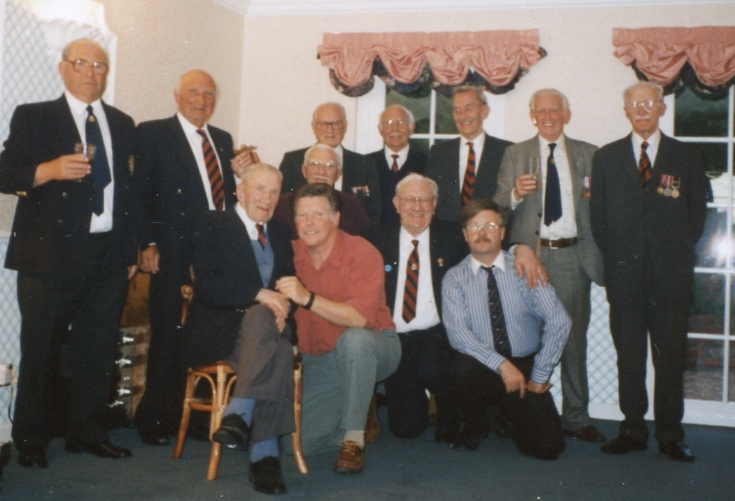
Reunion in Perth in October 1995
A reunion took place in Perth in 1995 and the Lothians gathered to celebrate.
PHOTOGRAPH 10C1
PHOTOGRAPH 10C2
PHOTOGRAPH 10C3
 12Jun43.JPG)